
This ultimate guide on how to make pasta dough is truly an ultimate guide. You'll find detailed information for every step of the pasta making process as well as a comprehensive look at ingredients and equipment.
This guide has been developed over more than 10 years of pasta making and almost a year of research and testing recipes and methods.
I organized the information into steps in order to make the process easier to understand. At the top you'll find a quick tips summary so you can get the highlights if you don't have time to read.
Each step is it's own section, and in each section you will find information going from the more general to the more specific.
There's a lot of information here and it's not necessarily meant to all be absorbed at once. Feel free to use this as a reference guide and just CTRL F your way through if you're looking for specific information (or leave a question in the comments and I will try to reply promptly).
If you just want a recipe, you can also jump straight to the recipe card.
Quick Summary (Top Tips)
- What is good pasta: Good pasta is pasta that has a slightly nutty or buttery flavor along with a springy and light bite. The perfect texture for pasta in one word is elastic: a strong and firm structure that is at the same time flexible and has some bounce. This can be achieved with a lot of different recipes made with some minor adjustments. The way it's rolled out and shaped also has an impact.
- Basic pasta ratio: The basic ratio is 2 parts flour to 1 part liquid (either water or egg). If you're just starting out, this is a great ratio to start with. To fine tune the process, start with 20% less flour for egg pasta (to get a springier, more tender bite) and start with 20% more flour for water pasta, to prevent it from being too soft or gluey. These slightly modified ratio doughs are a bit more challenging to work with (because they're stickier and harder respectively) but will result in the best pasta doughs if you follow some of the technique tips in this post.
- Choosing a flour: You can make good pasta with many types of flour. If all you have is plain flour and eggs, you can make great pasta. If you want to refine the process with special flour, tipo 00 makes the best egg pasta dough and semolina makes the best water only pasta dough. A pasta dough made from plain flour and water is a more challenging combination to work with, but can be done with the right ratio and some tips.
- Egg vs water: In general egg doughs are more forgiving and result in a pasta that has nice bite and bounce without a lot technical skill required. Water only doughs can be a bit more challenging but can also be mastered with the right ratio and technique.
- Special equipment: You can easily make pasta with nothing but a rolling pin and a good knife. You don't need special tools. In each section of this post there's information on whether special equipment can help to speed up or refine the process, or whether it's wholly unnecessary.
Jump to:
Step 1: Choose a Pasta Dough Recipe & Ingredients
Fresh pasta can be as simple as combining flour and water or egg according to the golden ratio of pasta, 2 parts flour to 1 part liquid.
If you want to know more about adapting and shaping pasta dough recipes for different ingredients, then you'll find the following information in this section:
- How to adapt a recipe if you use a different type of flour or if you're making pasta without eggs;
- What role do salt and oil play in pasta dough;
- How to make pasta dough with additions like nuts, cheeses etc.).
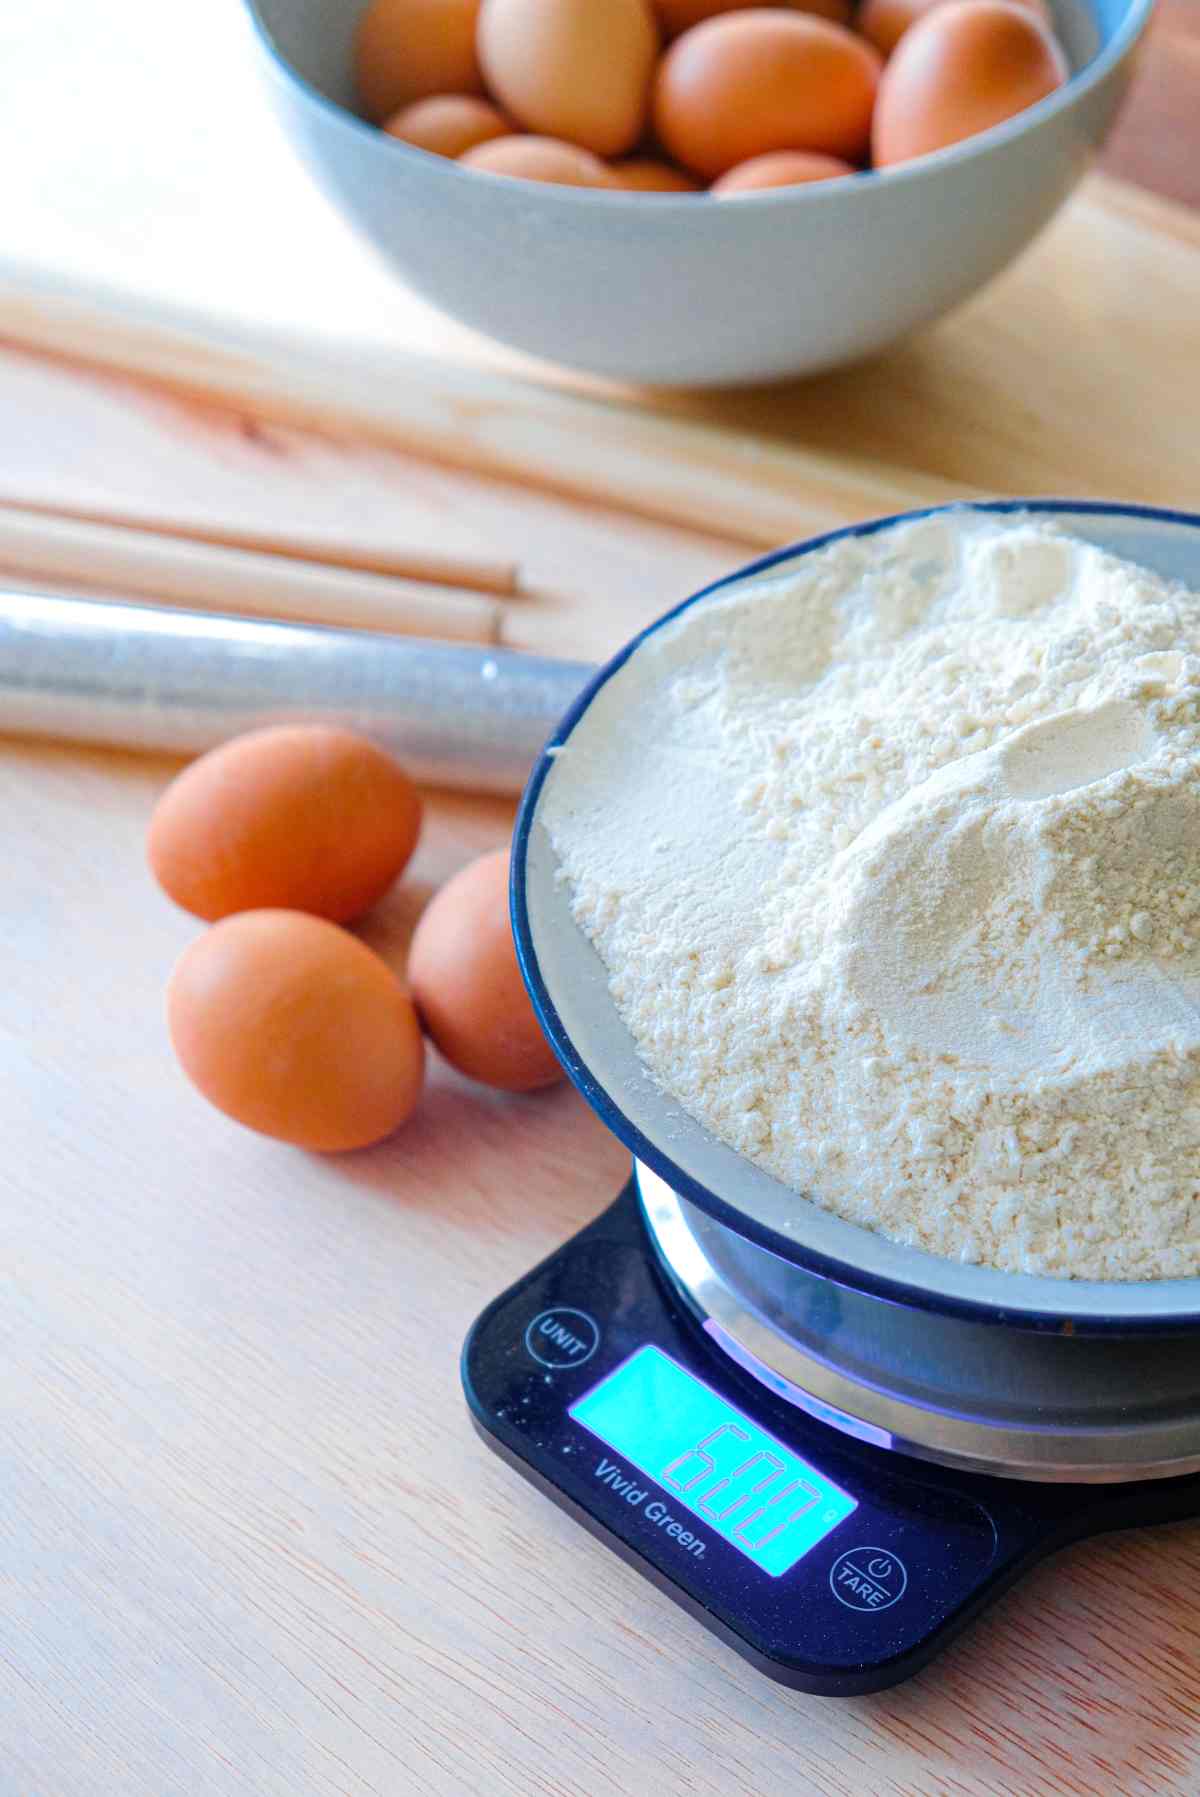
How to properly measure pasta dough
A kitchen scale is unequivocally the best way to measure pasta dough if you want to master the process.
I believe the majority of passionate home cooks have an instinctive streak and tend to cook by feel without measuring. Pasta grannies are masters at their craft and without a doubt, they make world class pasta without a kitchen scale in sight.
I totally get that and if left to my own devices, I would never measure anything. I suspect many of you out there are the same.
But using a kitchen scale will make you a better cook with a more masterful understanding of ingredients and outcomes in a shorter amount of time.
By measuring specific quantities you are more precisely controlling one possible variable out of a lot (how you mix, how long you mix, the temperature of the room etc.), you'll learn much quicker exactly which variables to tweak to make your perfect pasta.
To that end I recommend a basic kitchen scale (this is the one I use - no bells and whistles necessary) as well as the metric system of measures in order to set up your benchmarking.
The metric system is what's used in Italy and in many countries around the world. It makes for easier understanding of ratios and percentages than the imperial system (to say nothing of volumetric).
In any case I've provided conversion charts in this post that translates metric weight to imperial and to volumetric in case you don't have a kitchen scale or just can't do the metric system.
Fresh Pasta Dough Ratio
As a general rule, the ratio for making pasta dough is 2 parts flour for every 1 part liquid by weight.
An egg weighs about 50 grams so that means 1 egg for every 100 grams of flour. Keep in mind this is just a starting point because egg doughs should have a slightly higher proportion of liquid and eggless dough should have slightly less.
Here is a metric to imperial to volumetric conversion chart of the golden ratio to make things easier:
| System | Flour | Egg |
| Metric | 100 grams | 1 egg (100 grams) |
| Imperial | 3.5oz | 1 egg (1.7oz) |
| Volumetric | 1 cup | 1 egg (¼ cup) |
To prove the general rule holds, here's a table with the recipes and ratios for a few different sources that are considered reputable on the topic of fresh pasta.
| Source | Recipe | Ratio (100g flour to liquid by weight) |
| The Silver Spoon: Traditional Italian Home Cooking Recipes | Egg pasta dough: 200g tipo 00 flour, 2 eggs 1 egg yolk (20g) | 100:60 |
| Larousse Gastronomique: The World's Greatest Culinary Encyclopedia | Egg pasta dough: 500 grams flour, 5 eggs, 2 tablespoons oil (30g) | 100:56 |
| Pasta Grannies: The Official Cookbook: The Secrets of Italy's Best Home Cooks | Egg pasta dough: 100g tipo 00 flour and 55g egg | 100:55 |
| Pasta Grannies: The Official Cookbook: The Secrets of Italy's Best Home Cooks | Eggless dough: 45-50 grams tepid water for 100g flour | 100:45 |
You'll notice that the egg doughs have a higher proportion of liquid compared to the eggless dough.
Pasta Dough Recipes (for 4 servings)
The following is a quick reference chart with recipes to follow for pasta doughs made with different types of flours, and made either with or without eggs.
In general egg doughs should be slightly wetter and eggless doughs should be slightly drier. This is in order to achieve a higher protein content which gives pasta dough a nice spring and bite.
| For 4 servings | Metric | Imperial | Volumetric |
| Egg dough with 00 flour, plain flour or semolina flour | 400 grams flour; 220 grams liquid (4 large eggs and +/- 20 grams water); 5 grams salt. | 14oz flour: 7.7oz liquid (4 large eggs and +/- 0.67oz water); 1 teaspoon salt. | 2.5 cups flour: 4 large eggs, (+/-) 2 tablespoons water; 1 teaspoon salt. |
| Eggless dough with 00 flour, plain flour or semolina flour | 400 grams flour: 185 grams water, 5 grams salt. | 14oz flour: 6.25 fl. oz water; 1 teaspoon salt. | 2.5 cup flour: 0.80 cups water; 1 teaspoon salt. |
Please keep in mind these are just a reference tool to better understand how the ingredients interact. These recipes aren't the be all and end all of pasta. There are a lot of recipes and methods out there.
For example it's quite common to combine tipo 00 and semolina flour in order to harness the best properties of both.
Finer details on ratios, mixing method and texture: the wet mixing technique
A notable anomaly to the general rule is the recipe in Marcella Hazan's Essentials of Classic Italian Cooking which calls for 115g of flour to 2 large eggs. This would mean 100:87 - a very wet dough.
If you try this ratio you'll immediately see it's an incredibly wet dough. Actually so wet you can't really handle it.
I had to add an extra 60 grams of flour to make it workable, which brought up the ratio to 100:57, which is in line with the other ratios above.
I believe the reason the dough is so wet is that Marcella was applying a wet mixing technique that's actually quite common in pasta making, but is usually conveyed in the mixing instructions and not in the ingredients.
Marcella initially mixed a 100:87 dough, and then (I suspect) she worked it (kneaded it until it went from sticky to smooth and supple) on a very liberally floured surface allowing as much flour so absorb as was necessary for the dough to be workable.
This is actually quite ingenious because it has 2 effects that make for better pasta:
- By first mixing a very wet dough, you are giving the gluten a head start to develop a more elastic structure;
- Adding in additional flour as needed ensures the dough is as wet as it can be (which is good for texture and flavor since the egg adds both) and only absorbs as much flour as needed to make it workable.
In general this technique makes for a better pasta, but it can also be more challenging if you're just starting to make fresh pasta since you start with a dough that's very wet, sticky and hard to work with.
Eventually you develop the feeling in your hands to be able to work with this type of dough. The key is to handle it with your fingertips and use light, pecking motions to flip and knead it until it no longer gives way and sticks when gently pressed.
The dough should still be moist enough that it sticks when pressed hard, but not when pressed gently. That is the secret to good pasta texture.
Best flour for fresh pasta dough?
Choosing the right flour for pasta is a matter of understanding how the protein content and grind of flour impact the texture of pasta dough.
In general, higher protein flour (12%-14%) is better as it gives more bite.
This is why tipo 00 and semolina are considered good flours for pasta. Both have very high protein content.
Tipo 00 and egg is probably the most common pasta dough in Italy. Second to that is semolina and water. A pasta dough made from semolina and egg is quite rare (although has a very nice texture and flavor in my opinion - I suspect the reason it isn't so common is due more to historical factors than culinary ones).
Regular flour (also called plain flour or all purpose flour) usually has a lower protein content (around 8%-11%). To make a really good pasta with regular flour, it's best to use eggs as the liquid since they add more protein and make for better texture and bite.
If your options are limited then use bread flour instead of regular flour if it's available to you, as it has more protein and will improve the texture of your pasta.
If you want to make eggless, semolina is best since it has high protein and also is made from a very hard variety of wheat, which gives it more structure and makes pasta with better texture (especially necessary in the absence of the additional protein added by the egg).
Egg vs water pasta dough
Have you ever wondered why eggs are used to make pasta dough and not, say, vegetable puree or nut butter? It's silly but also a good question if you think about it.
Eggs are a great addition to pasta because they contribute both protein and fat to the dough, which helps make that perfect elastic texture.
Eggs have about 13 grams of protein per egg. This means that the addition of an egg can more than double the protein content of 100 grams of flour.
Keep in mind that egg white and egg yolk have different effects on the pasta dough. Egg white, having a higher protein content, is what gives structure and firmness to the dough.
Egg yolk, having more fat, is what tenderizes the protein and provides suppleness.
This is part of the reason eggs are such a perfect addition to pasta.
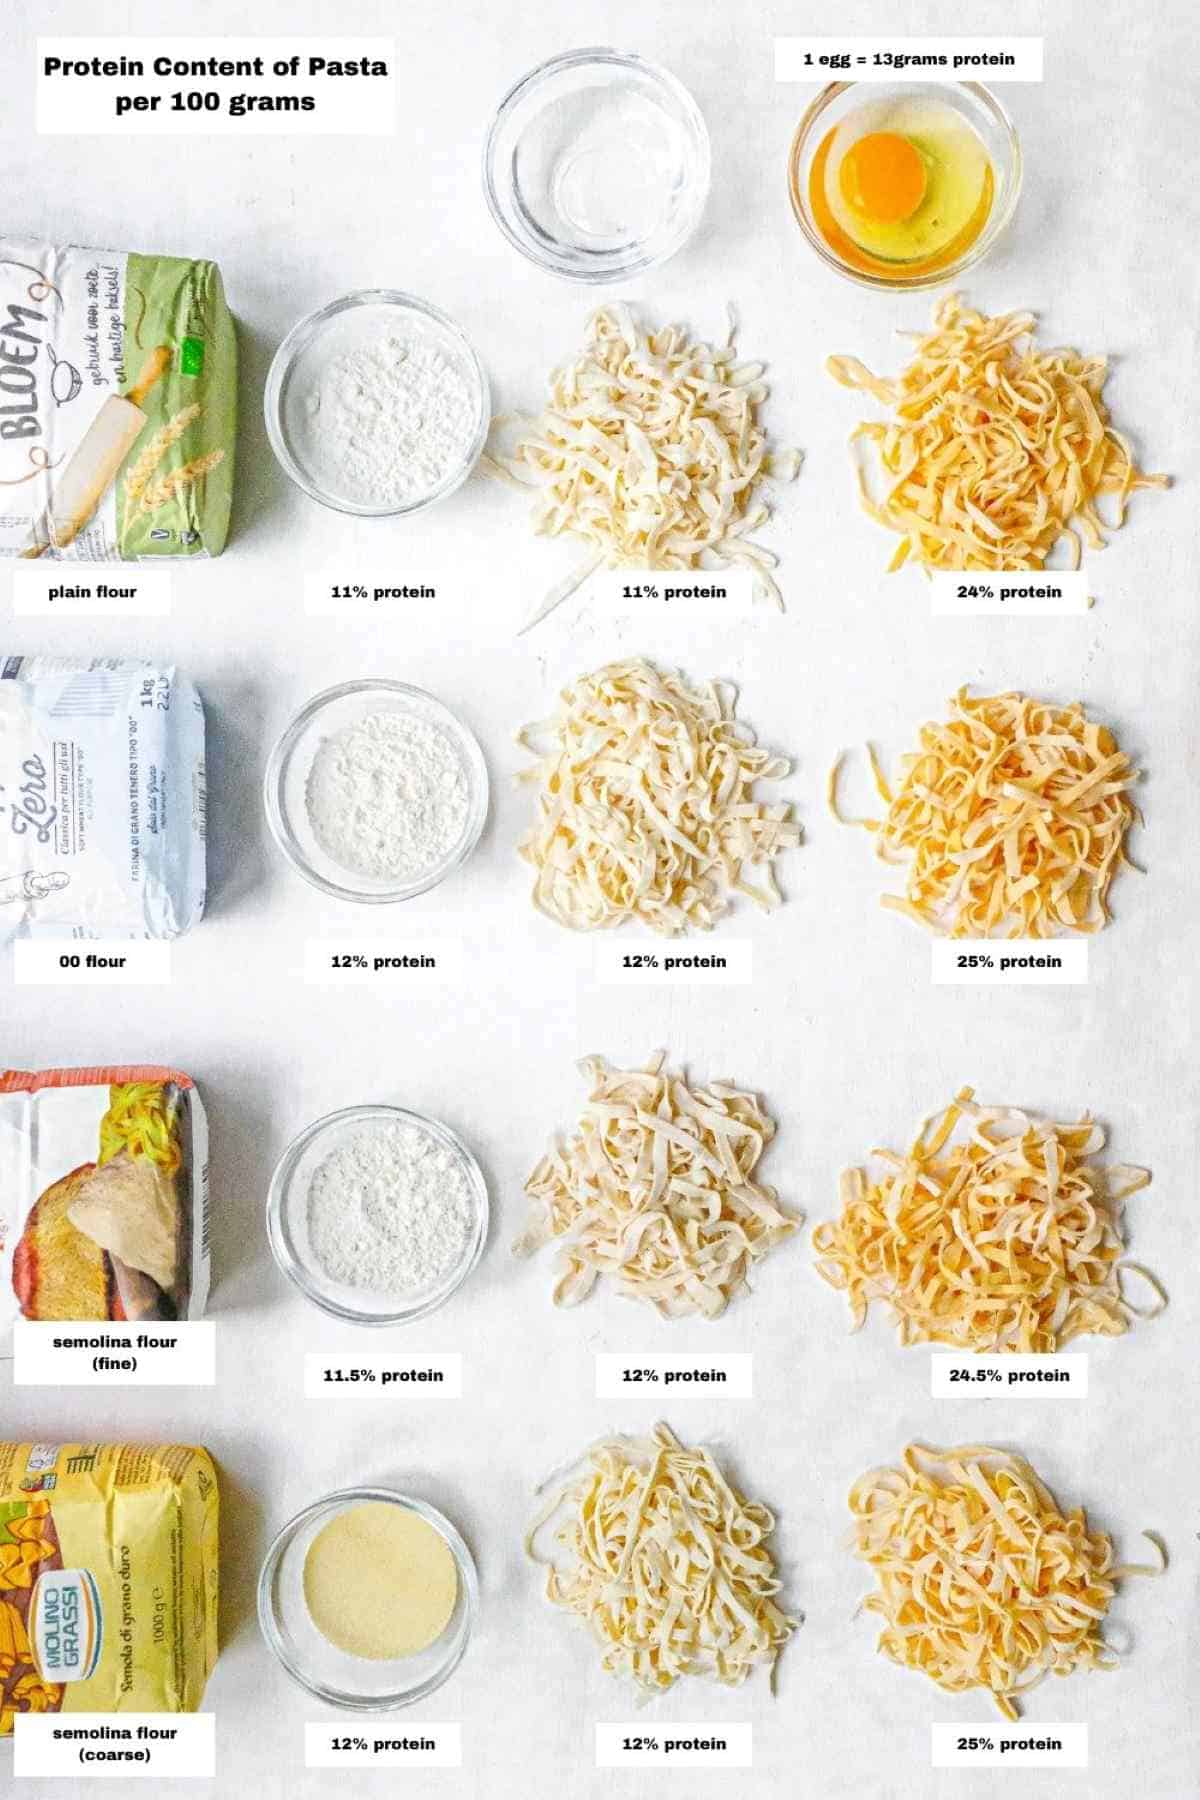
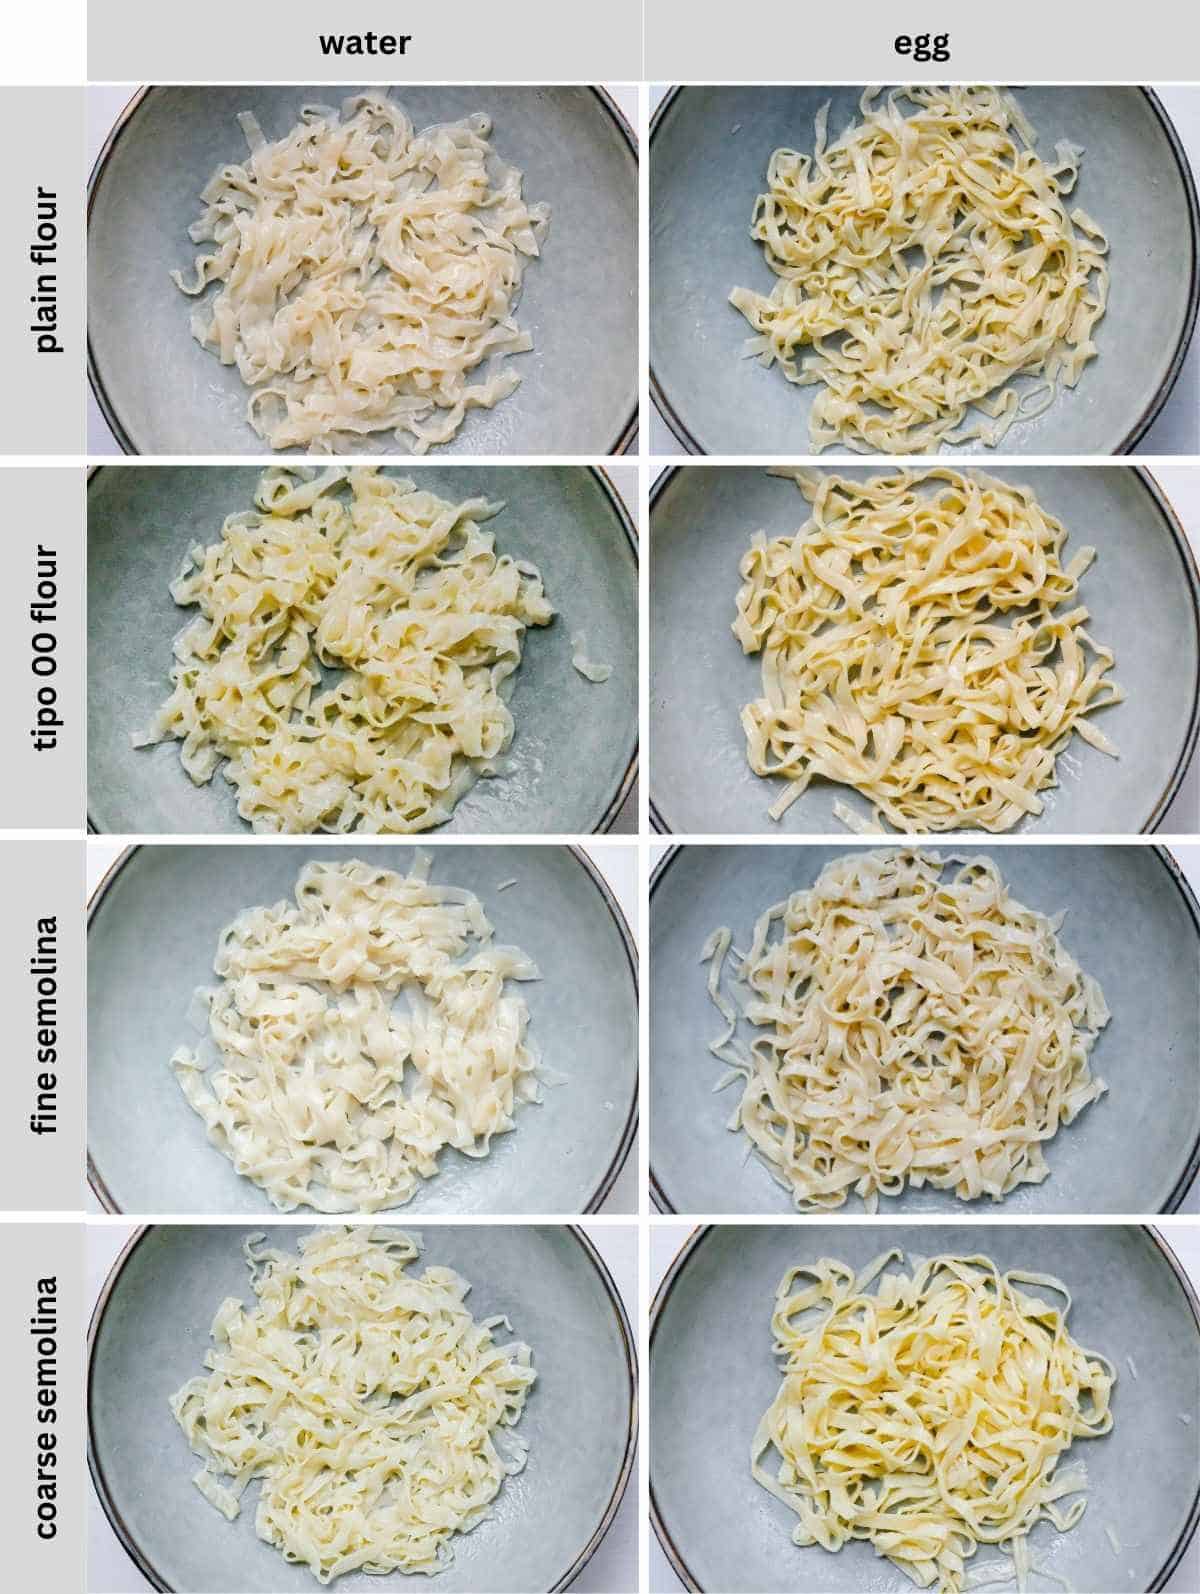
You can also visually see the difference that different flours and water or egg make on the finished pasta by looking at this photo below. All these pastas are made with the exact same ratio.
You can see the plain flour and water pasta which has the least protein and structure looks very soft, almost gelatinous. The coarse semolina and egg pasta has the most structure, and you can see it makes very defined, firm noodles.
Pasta Dough Additions
Added while mixing the dough
- Salt: Salt is really important for pasta dough not just because it enhances the flavor, but also because it increases the elasticity of the gluten.
- Oil: It's a bit of a misconception that olive oil is supposed to be added to anything and everything Italian. When it comes to pasta, oils and fats weaken the protein (gluten) in pasta dough. This is why tender short-crust pastries are made with basically just fat and flour, because the goal is a short crust with virtually no gluten development. For pasta we want a lot of gluten development, but also for the gluten to be supple and not stodgy. So whether you do or don't use oil depends on the pasta dough recipe you're using. For a pasta dough with a higher concentration of protein (like tipo 00 and egg dough), oil can have a positive effect by tenderizing the dough and making it more supple. For a dough that has lower protein content (like a dough made from plain flour and water), oil can have the exact opposite effect: it can make the dough limp and soggy.
- Spinach (or nettles, other greens etc.): Spinach is a really common addition to pasta dough which results in a beautiful green pasta. Spinach or other greens (blanched, well drained and finely diced) can be added to pasta dough at a ratio of 50 grams drained spinach to every 100 grams flour, but only to a maximum of 200 grams total (no matter how big your pasta recipe gets). You don't need to change the ratio of flour to liquid when adding greens.
- Nuts: Finely ground nuts like walnuts, hazelnuts and chestnuts are often added to pasta dough or can even be milled into flour to make pasta wholly out of nuts. Since nuts have a high fat content they tend to have a tenderizing effect on the gluten in the pasta dough and should be added to doughs with a high protein content in order to get a nice texture pasta dough.
- Cheese: Grated hard cheese can be added to pasta dough. The high fat content of cheese has a tenderizing effect on the gluten in the pasta dough and so cheese should be added to doughs with a high protein content like tipo 00 and egg or a low hydration semolina dough.
- Cocoa powder: That's right, you can make chocolate pasta. See my chocolate pasta dough recipe.
- Squid ink: Cuttlefish squid ink (nero di seppia in Italian) is an interesting addition to pasta if you want to do something a bit more out of the ordinary. According to The Silver Spoon: Traditional Italian Home Cooking Recipes, squid ink can be added to pasta dough at a ratio of half a tablespoon squid ink for every 100 grams of flour. It makes the dough black. It should be noted that opinions (even amongst Italian cooks) can be divided. Marcella Hazan hilariously describes squid ink pasta as "that deplorable black pasta" and says the squid ink only makes it so the dough doesn't taste fresh. To each their own.
- Other liquids: There are a lot of other liquids that can go into pasta dough, either to change the flavor or just the color. For example, a teaspoon of tomato paste for every 100 grams of flour will add a nice orange color and tomato flavor. pumpkin puree can also be added, 1 tablespoon pumpkin per 100 grams of flour - but you may need to adjust the ratio of dry to wet a bit. It's also common in Italy to replace water with other flavourful liquid - for example broth (beef, pork, vegetable etc.) or wine.
Added after mixing the dough
- Fresh herbs like basil or sage: You can achieve a really beautiful effect by pressing fresh herbs like basil leaves between sheets of dough and then rolling the dough out. The process of pressing layers of pasta dough together repeatedly is called pasta dough lamination. More information on this advanced technique is in the section on rolling out the pasta dough.
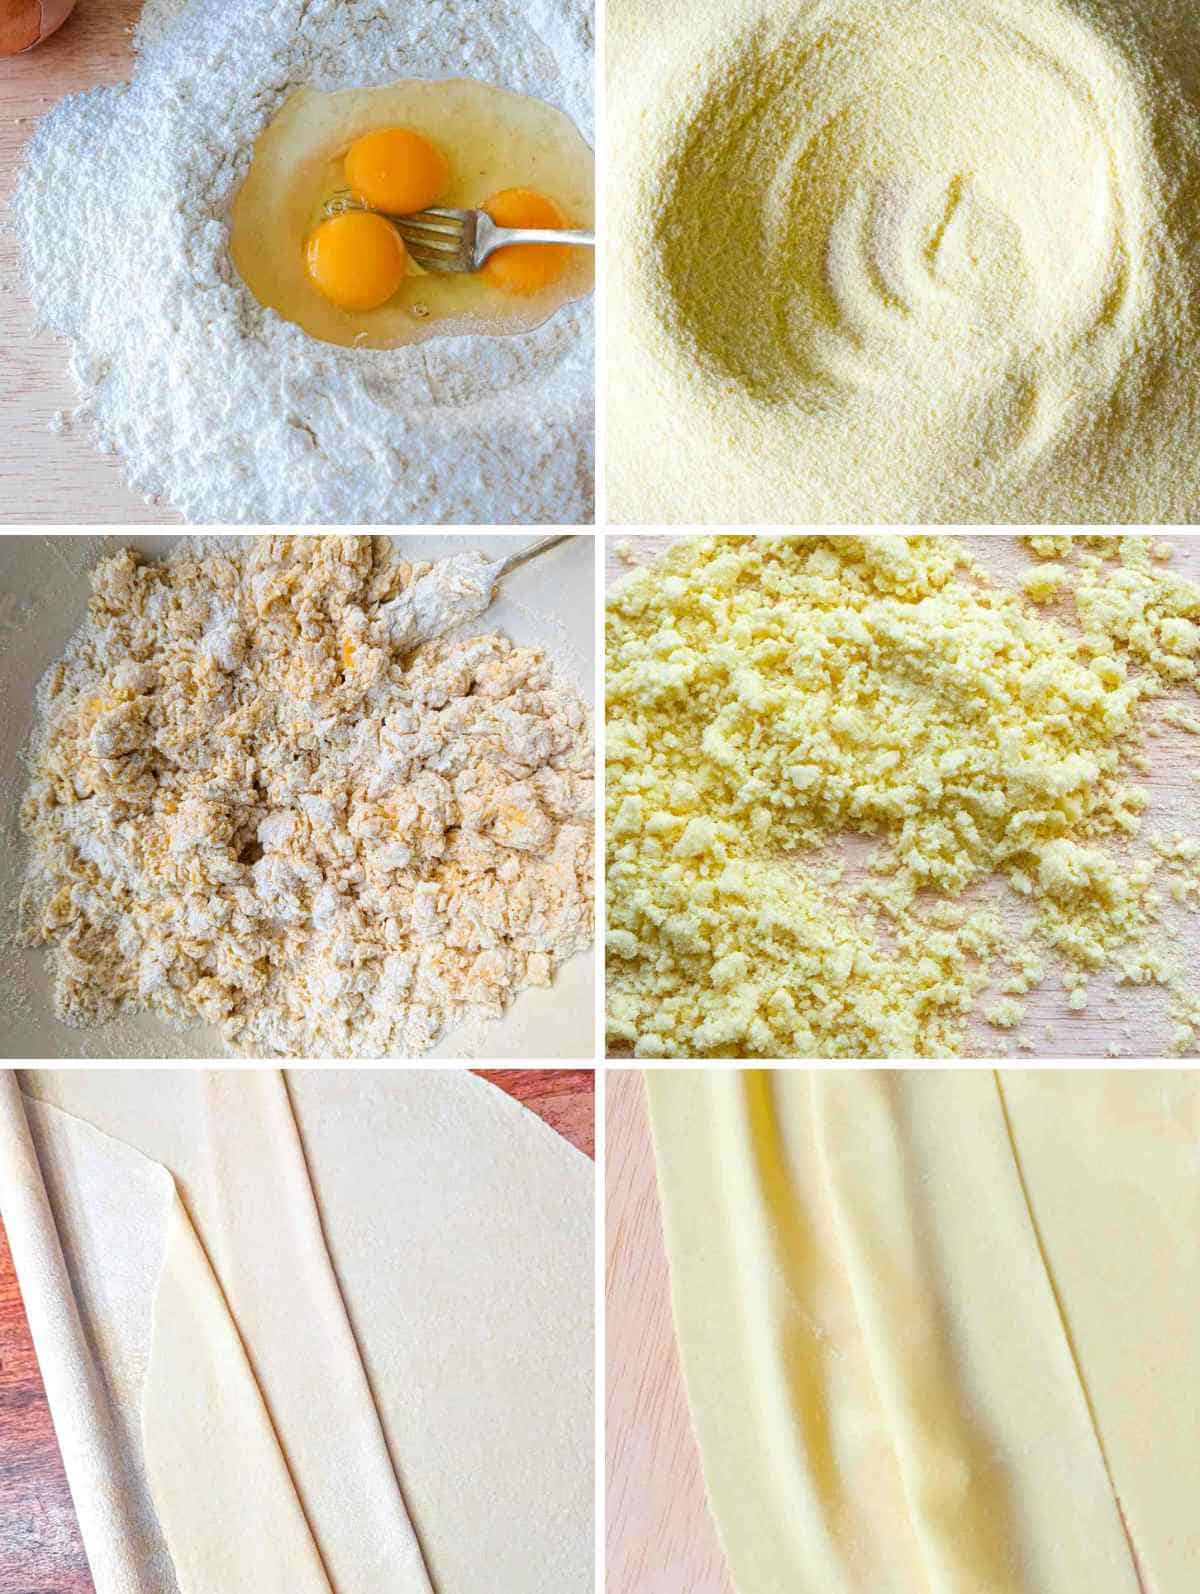
Step 2: Mix, knead and rest the pasta dough
Mixing the pasta dough is probably the simplest (i.e. the least technically challenging) part of making pasta dough.
You really just mix the ingredients together and then knead by hand for up to 10 minutes until the dough is smooth.
There are some tips below for how to deal with dough if it's too wet or dry and also a few things to be aware of that will refine this part of the process.
Resting the dough is essential - don't skip it
Resting is important because it allows the flour to fully absorb the liquid. You will notice that after 30 minutes of resting, dough is much softer and springs back when pressed.
If the dough doesn't spring back up when pressed (i.e. if it's hard) then it's a sure sign the dough is too dry.
You can rest the dough by covering with a kitchen cloth or cling film and keep it at room temperature for about 30 minutes. If you want to rest it for longer or make the dough ahead, see the section below on storage.
Too wet is better than too dry
The most important thing to keep in mind when mixing pasta dough is that it's during the mixing stage that you will see if the dough is too dry, and this is the best moment to correct that issue before it gets difficult to deal with.
It's easier to add more flour to a dough that's too wet, rather than adding more liquid to a dough that's too dry. Both can be done, but much easier doing the former than the latter.
If you follow one of the recipes above, you will already start with a ratio has the proper hydration level and shouldn't have any issues with too wet or too dry dough.
But just so all bases are covered, here are some tips on dealing with too wet or too dry dough.
If the dough is too wet
You will know the dough is too wet if it's too sticky to handle with a light touch. If you can't even gently poke it without it sticking to your finger, it's too wet.
If the dough is too wet, sprinkle on more flour until you can handle it without it sticking to your hands.
The dough should get sticky if pressed hard (this is a good level of hydration) but shouldn't be sticky if handled with a light touch. You'll need to find the balance by feeling it our yourself.
If the dough is too dry
You will know the dough is too dry if you see any dry bits or if it doesn't spring back when pressed (even after resting).
If the dough is too dry, my preferred method is to add it to a bowl along with a few tablespoons of water. You'll need to rub and knead the dough until the water absorbs.
This is hard at first because the dough seems impenetrable, but if you continue kneading eventually it will absorb the water. It helps to press down hard with your knuckles to make deep grooves and then fold the dough on itself repeatedly until the liquid absorbs.
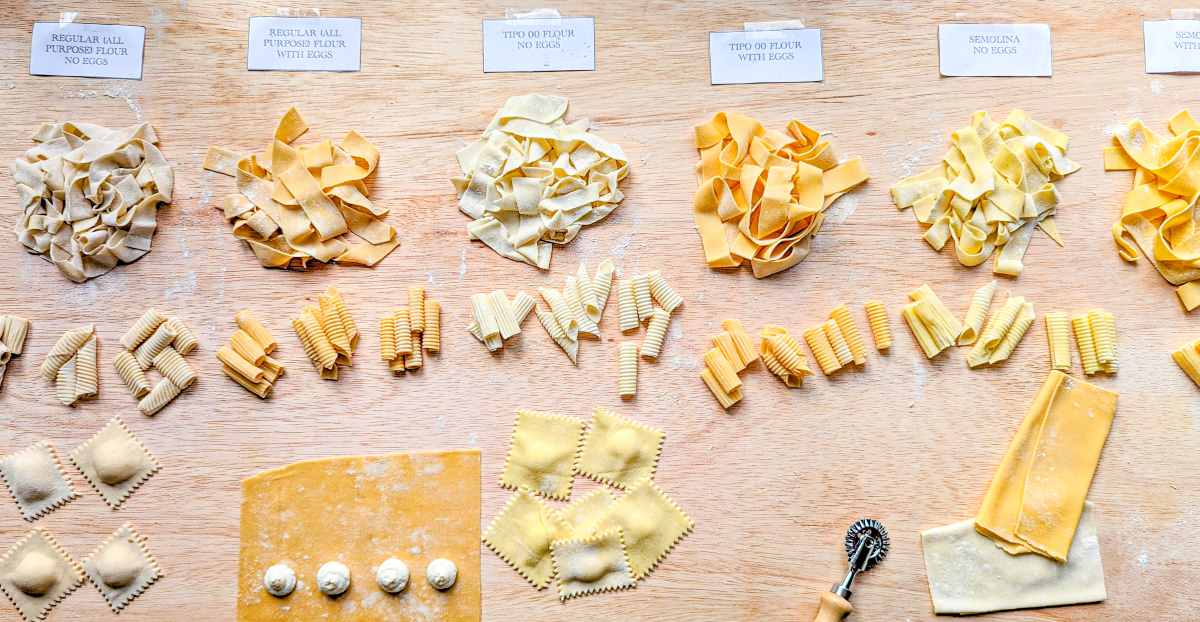
Comparing tipo 00 dough and coarse semolina dough
As you can see in the photos above, tipo 00 flour and coarse semolina flour can mix very differently. As long as there is enough liquid in the dough, you just need to keep mixing and they will smooth out.
A note on semolina dough
Semolina tends to be quite sticky, especially if combined with eggs. The stickiness will disappear and the grainy feeling of the dough will disappear after 2-3 minutes of kneading.
Special equipment for mixing pasta
Since mixing is really simple you don't need any special equipment. It only takes a minute or two to get the dough fully mixed and then another 5 -8 minutes or so of kneading to get it smooth.
I would even argue that not using special equipment is better because it allows you to feel and get familiar with the dough. The moment of mixing the ingredients together is a moment to tune in and evaluate whether the dough has the proper hydration.
Step 3: Shape the pasta dough
Shaping pasta can be simple or complex. It can be as simple as rolling out dough with a rolling pin and cutting it into thin strips with a knife, or as complex as using special molds and dies to shape the pasta or adding herbs between the layers to get a beautiful effect.
This section starts with an overview of pasta shapes and then tips on rolling out pasta by hand and by machine. Finally there's information on special equipment that can be used to shape pasta.
Overview of pasta shapes
According to The Encyclopedia of Pasta, there are 1300 different names for 310 distinct pasta shapes. That's about 4 different names for each shape.
It goes to show that different names can often mean the same shape.
There aren't always strict dividing lines between, for example linguini, trenette, spaghetti alla chitarra, tagliatelle, and fettucine are all very similar but come from different regions or cities; Liguria, Genoa, Emilia-Romagna, Abruzzo and Rome respectively.
There are many ways to shape pasta. Some shapes are traditional for certain types of dough.
For example, it's traditional to make short shapes like orechiette and cavatelli with pasta bianca (semolina and water) whereas tagliatelle is usually made with eggs.
Pasta varieties from the North of Italy are usually made with eggs and tipo 00, while pasta varieties from the South are made with semolina and water (but this is not a strict rules and there are outliers on both sides).
You can find many resources online and in print for making different pasta shapes.
In general there are three broad categories when it comes to pasta shaping:
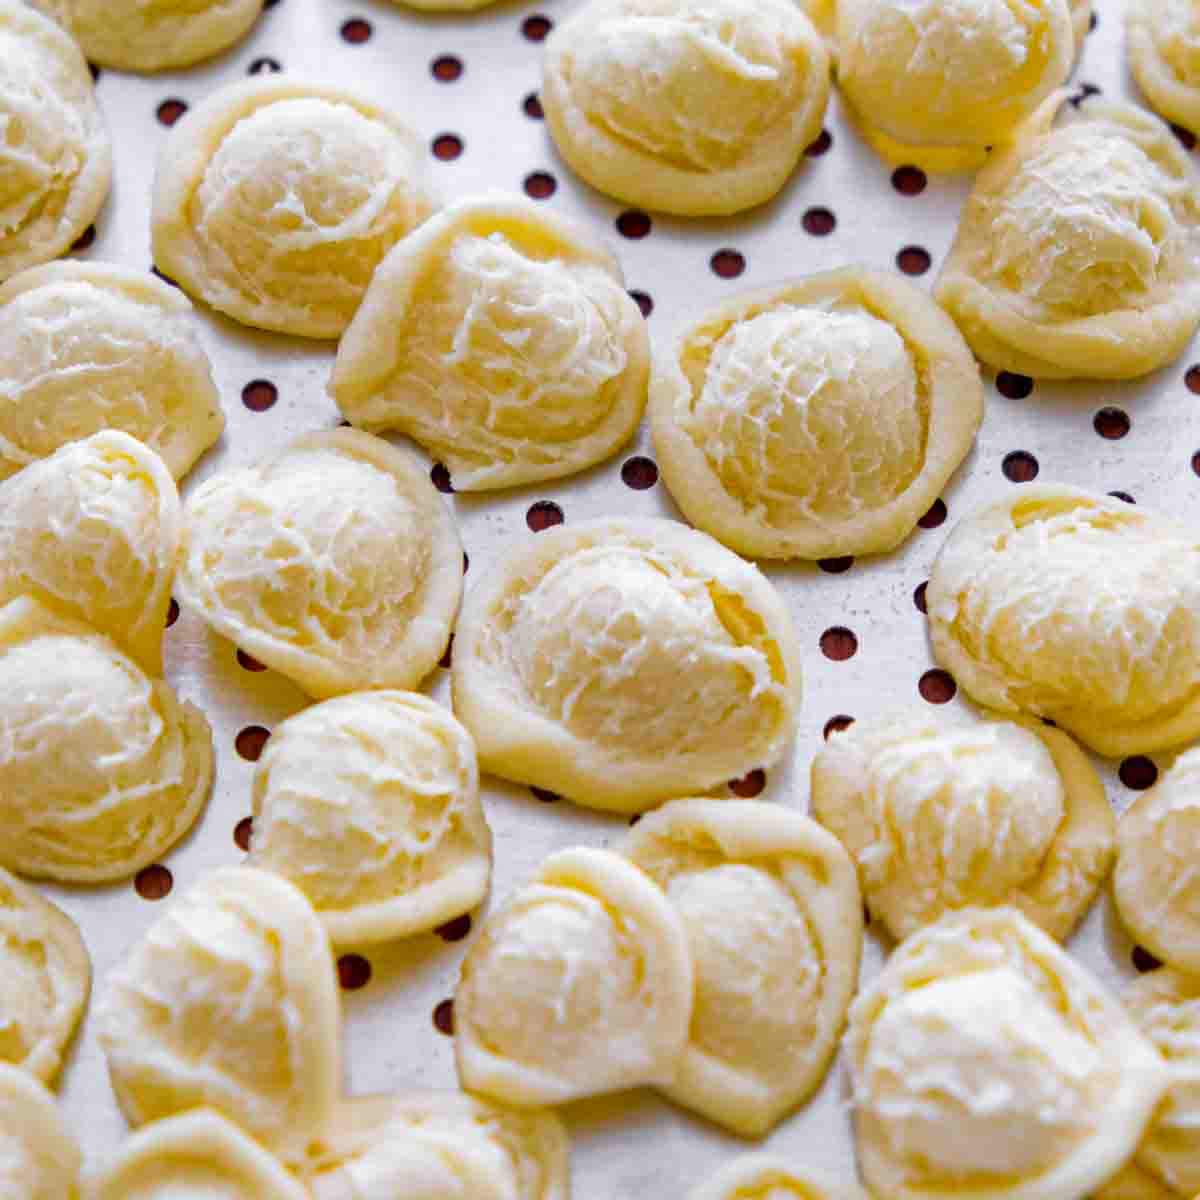
- Rolled out pasta: Pasta that is rolled out into flat sheets and then cut into long-shapes like spaghetti, tagliatelle, pappardelle, short shapes that may or may not be folded, like macaroni, corzetti and farfalle or stuffed shapes like ravioli and tortellini;
- Hand-shaped pasta: Pasta that is shaped by hand without rolling into flat sheets like orechiette, cavatelli, pici, busiate, fusilli al ferretto etc.
- Extruder pasta: Pasta shapes that can only be made with an extruder like cavatappi and radiatori (adorably named because they resemble little radiators). These types of pasta require special ratios, recipes and equipment so they're beyond the scope of this post. If this is what you're after, you can learn a lot from Pastafanataholics Facebook group which is a great resource for extruder pasta recipes.
Rolled out pasta: Rolling pin vs pasta machine method
When I first got my Marcato Atlas pasta machine I was absolutely thrilled. It really sped up the process of making pasta and the results were much more consistent and refined than what I could execute by hand at the time.
It took me a few years of making pasta to really be able to feel and taste the difference between hand rolled and machine rolled pasta. Likely in large part because I got better at making pasta by hand, and soon realized my hand-rolled pasta tasted better.
But there is a difference between machine rolled and hand-rolled, which only becomes more apparent the better your hand-rolling technique gets. I really like the way Marcella Hazan expresses the difference:
Pasta rolled by hand is quite unlike the fresh pasta made with a machine. In hand-rolled pasta, the dough is thinned by stretching it, with a rapid succession of hand motions, over the length of a metre-long wooden dowel...its surface is etched by a barely visible pattern of intersecting ridges and hollows; when cooked, the pasta sucks in sauce and exudes moistness. On the palate it has a gossamer, soft touch that no other pasta can duplicate.
Marcella Hazan, Essentials of Classic Italian Cooking
In my view, hand rolled pasta can have far better texture than machine rolled because it isn't just pressed, it's stretched as well. The stretching motion helps to bring more elasticity to the gluten, which is exactly what we're aiming for when we are trying to get the best pasta texture.
That being said, homemade fresh pasta rolled out using a machine is still infinitely better than store-bought fresh pasta. A pasta machine isn't a must-have by any means, but it is a great way to save time and get more consistent results when you're just starting out.
The section below details how to roll out pasta using the rolling pin or machine method.
How to roll out pasta by hand
Pasta rolled by hand can be used to make a lot of different types of pasta from flat cut shapes to stuffed and more.
Rolling out pasta by hand might seem like a lot of work and a bit unachievable but it is definitely achievable for the average home cook. The first few times might be challenging until you get a feel for it, but with practice you will get better and faster.
These days I feel I'm just as fast rolling out pasta by hand as I would be with the machine - maybe even faster if I'm really craving pasta.
Rolling pin method
- After resting the dough, flour a large work surface and flour the top of the pasta dough.
- Use a rolling pin to start flattening the dough, turning it a quarter turn after every few presses so that you are flattening it into a roughly circular, oval or rectangular shape. A rectangular shape is ideal if you're making stuffed pasta.
- If you're a beginner, it can be easier to work with smaller portions of dough at one time so feel free to cut the dough into smaller pieces (just remember to cover the rest of the dough so it doesn't dry out).
- If the dough starts sticking to the table at any point, add more flour to the work surface. Likewise for if the rolling pin sticks.
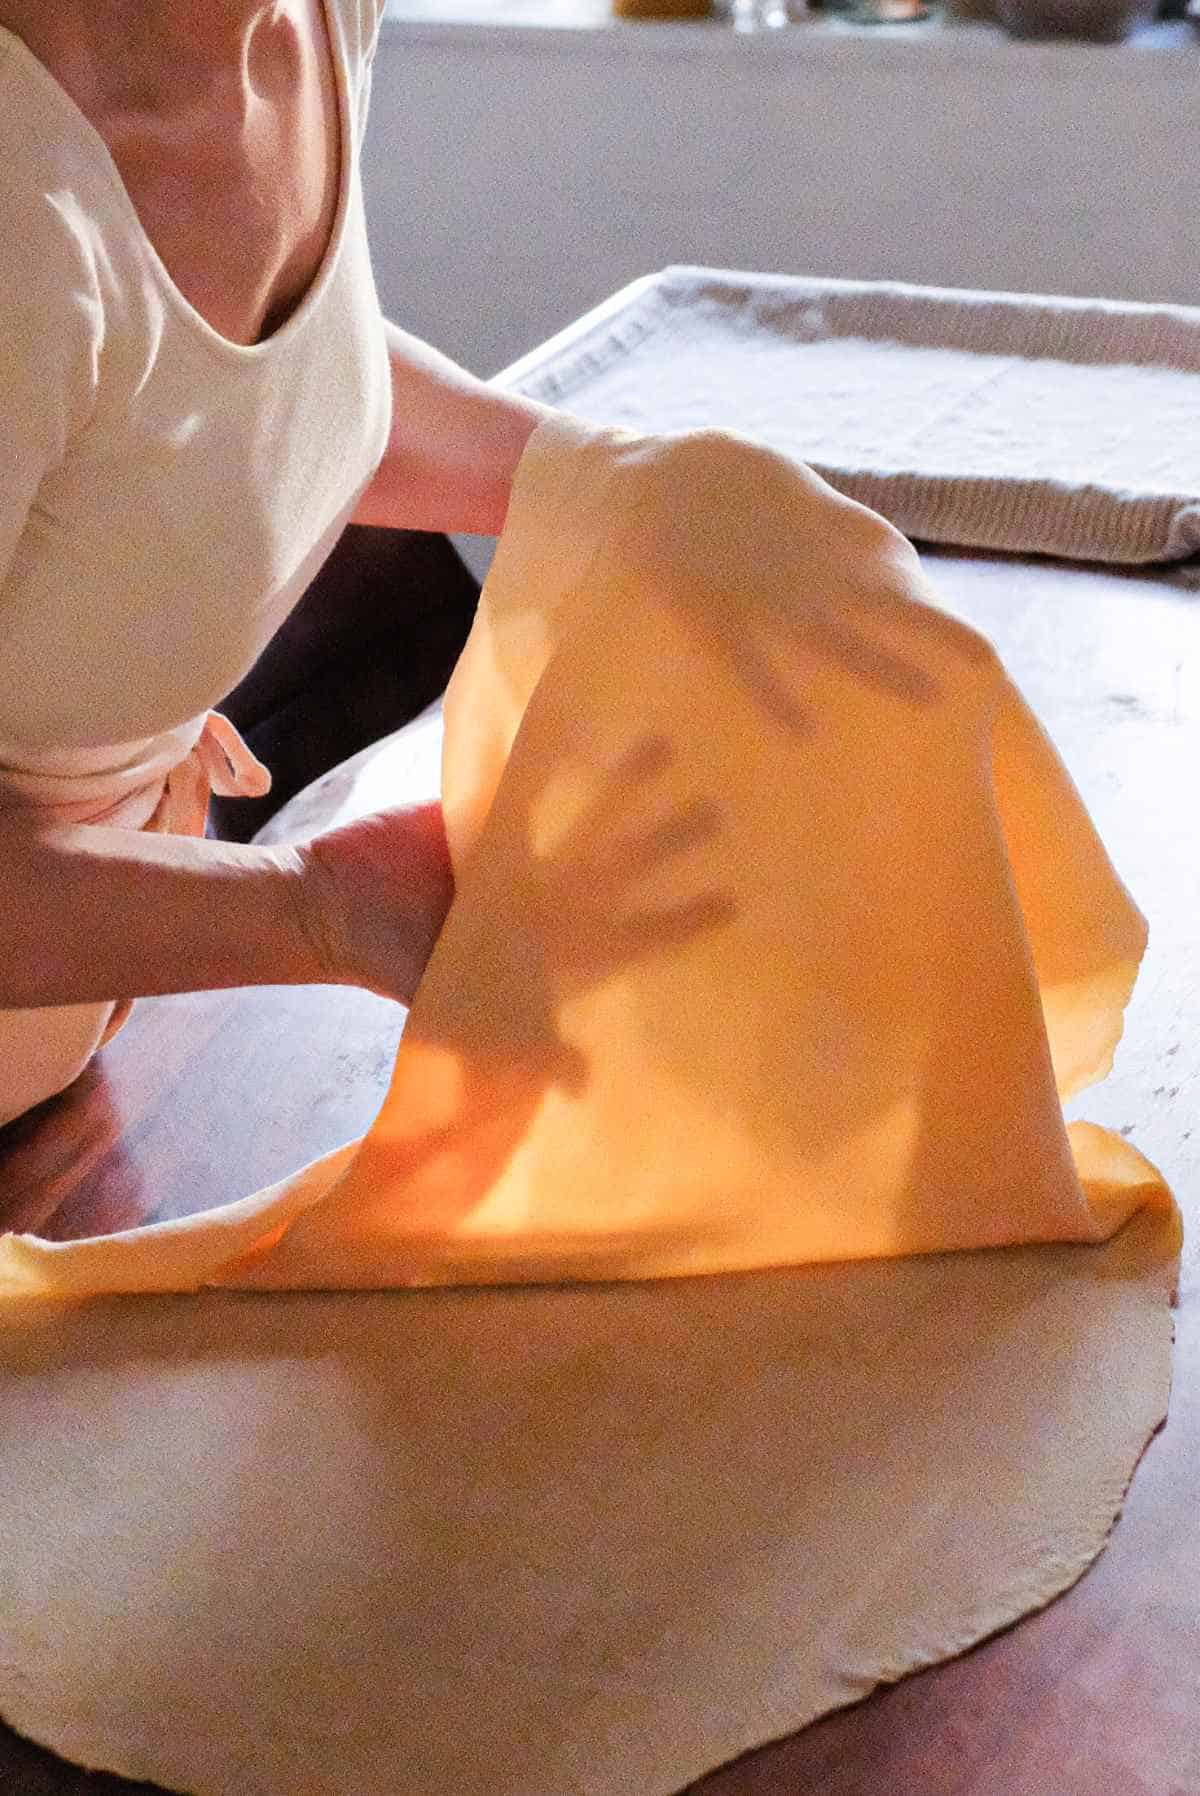
- Keep rotating the pasta and rolling it out until it's long enough that you can bring one edge to the end of the table and gently hold it in place with your hip. Then use the rolling pin to gently press while also stretching the other end of the dough away from your body.
- Continue doing this motion with one end of the dough pinned by your hip or stomach, while turning the dough every so often and making sure it isn't sticking on either end.
- Another technique you can use (if it feels right) is to keep on end of the dough pinned at your hip, and drape the other end over the rolling pin so it's coming towards you. Then gently stretch, slowly moving the rolling pin a bit further away from you along the dough with each stretch. Then repeat on the other end.
- Eventually you will notice you can see through the dough to the other side, and that some parts of the dough will be more opaque than others. Continue rolling it out until the color (and by extension the thickness) is even.
- Don't forget to flour the work surface frequently and keep the dough rotating- nothing is worse than having a beautiful thin sheet rolled out only to realize it's stuck to the table in the middle.
- One the dough is thin enough, you can proceed to cut and shape it. See the next section for that.
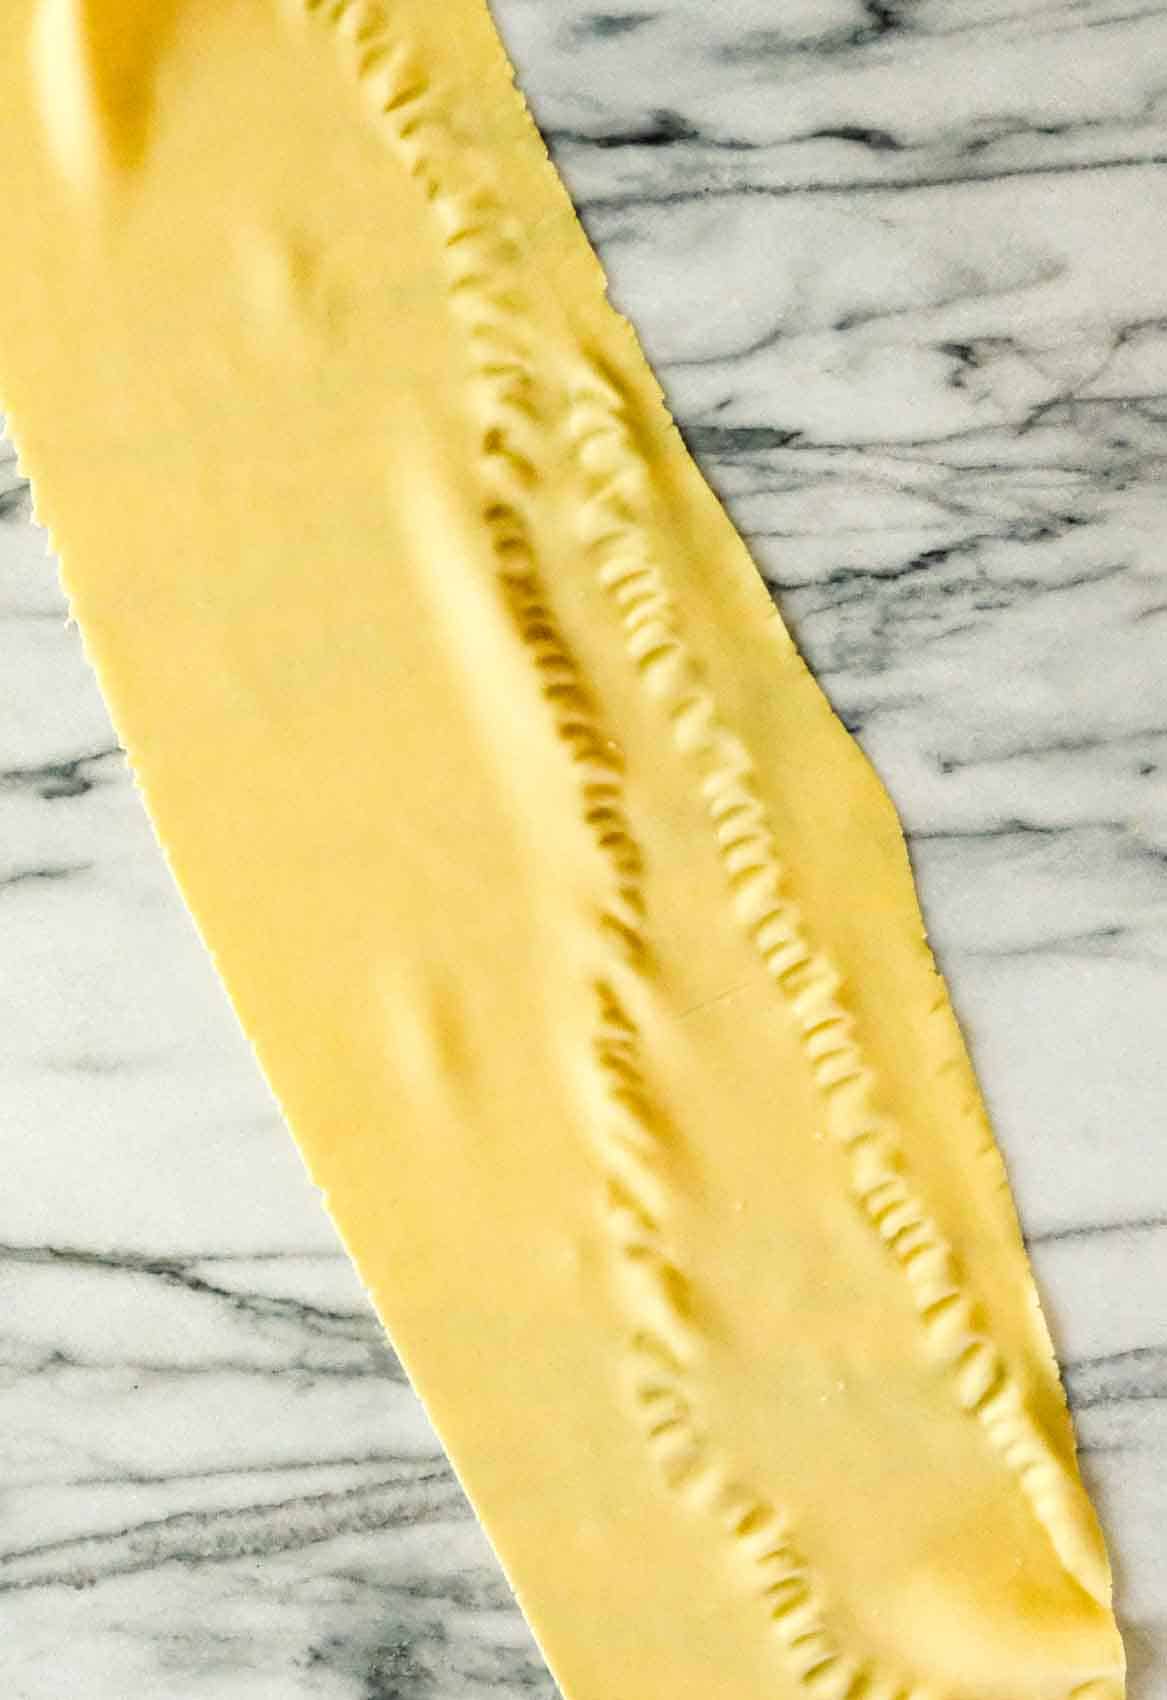
How thin should the pasta dough be rolled?
The pasta dough should be thin enough that light can pass through as you see in the photo above.
There's very little risk of rolling it too thin when rolling by hand, but it's probably too thin if there is so little dough between the rolling pin and table that the dough tears in some spots (especially around the edges).
Keep in mind that the edges and center should be rolled out as even as possible. This is part of the reason I like the French rolling pin for this - the width at the center makes it easier to ensure the center of the dough is also be flattened and stretched out.
There is much more of a chance that you will roll the dough out too thick the first time (or first few times). It's not always easy to see because the dough can seem thin enough when rolled out, but will swell and thicken when cooked.
It can also be the case that the dough is mostly thin enough, but a few spots are too thick. You will be able to feel this in the texture of the cooked pasta.
The best thing you can do is to practice - your dough will get much better each time you roll it out and you may even feel a great sense of accomplishment at being able to make amazing pasta dough totally by hand. It's like magic. What a great (dinner) party trick to have up your sleeve.
Choosing a rolling pin
You don't need a special rolling pin. The best advice is to use a rolling pin that feels good in your hands.
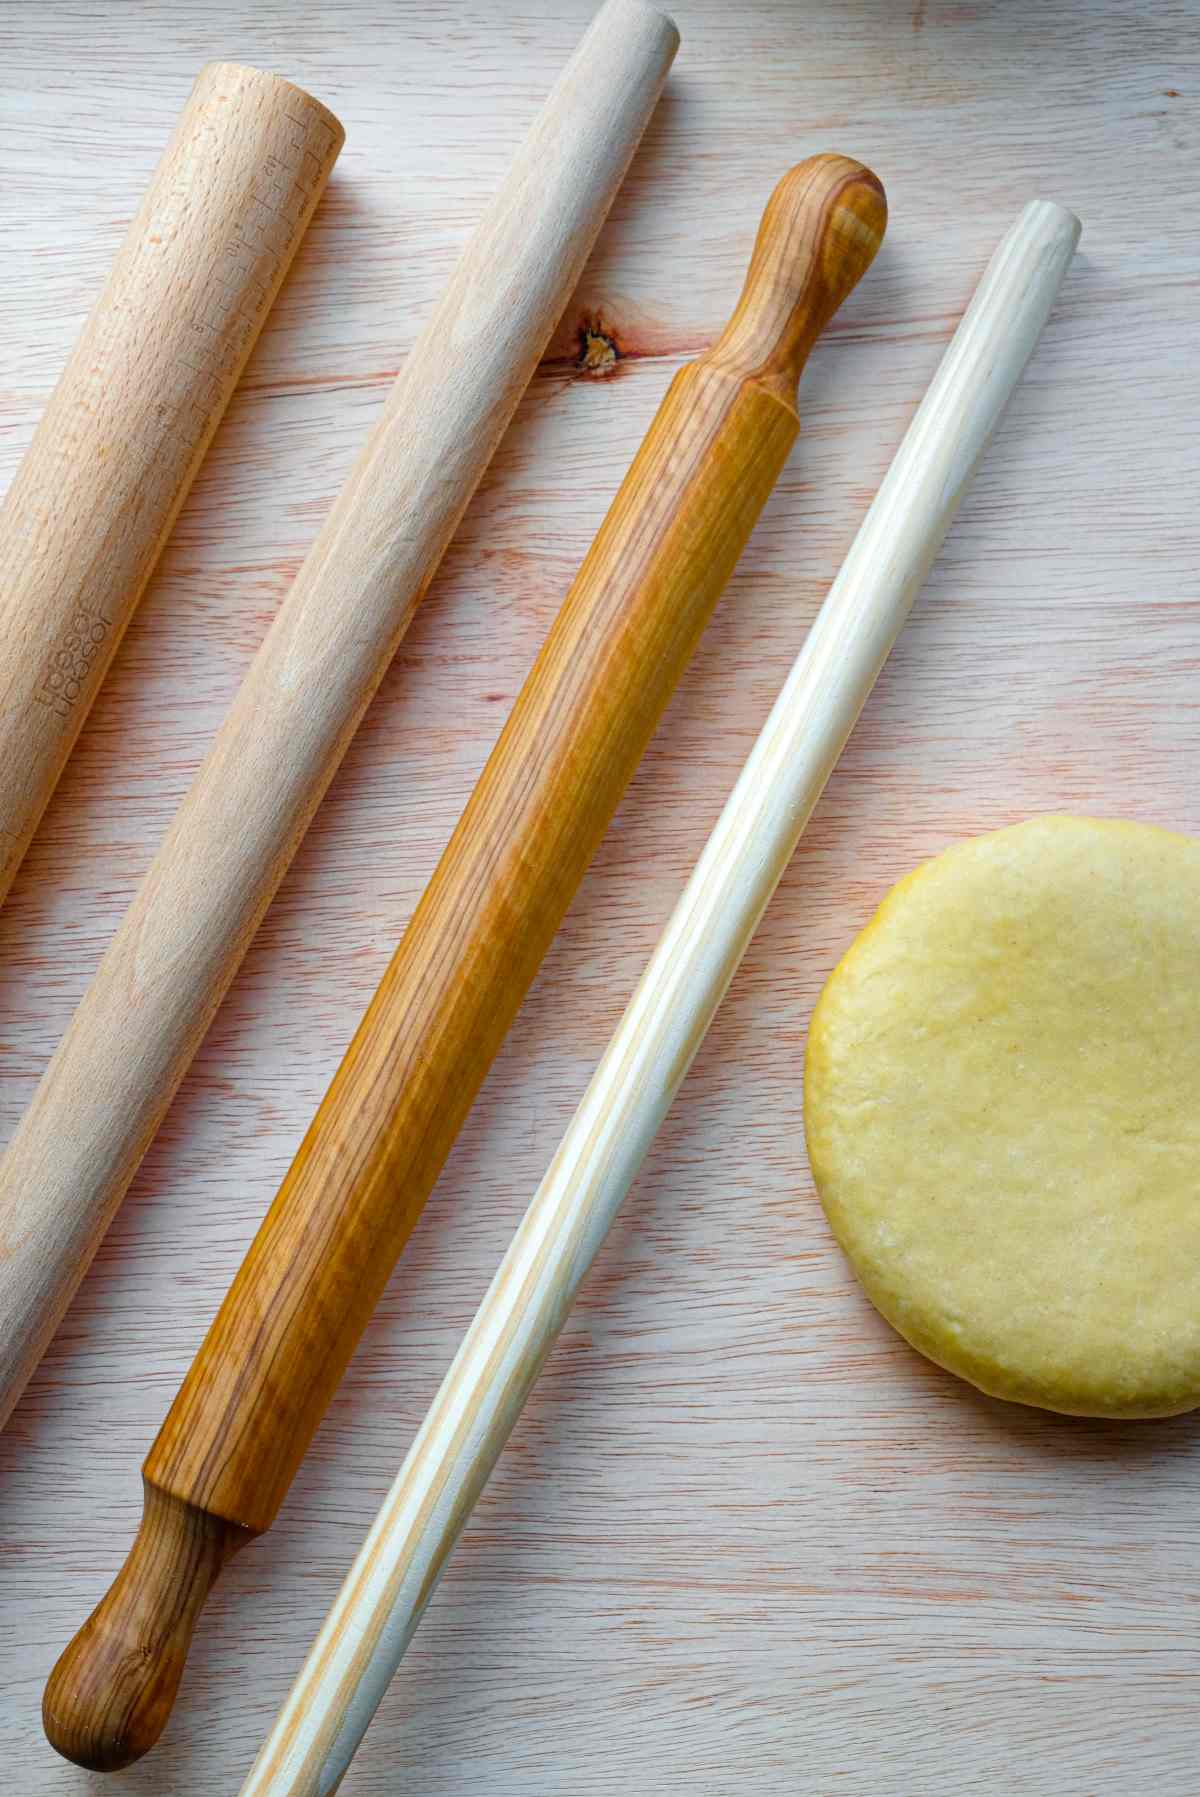
The traditional choice for pasta making is a very long cylindrical dowel called a mattarello - this is the first rolling pin in the photo above. A truly traditional version is quite long (about a meter / 40 inches or basically table width) but buying one outside Italy can be quite pricey which doesn't seem worth it to me.
Shorter versions measuring around 30 cm or 11 inches can be found for a fraction of the price. Plus a shorter one probably has more use in modern kitchens than a table width one.
Personally I find my French rolling pin (the second one in the photo) to be the most comfortable and effective for pasta. The tapering at the ends and width at the center makes it easier to press the center of the dough flat while also gently pulling the edges to stretch it out. Plus, it just feels better in my hands than the mattarello.
You can also use a simple dowel like the fourth rolling pin in the photo above. This is basically a (new and unvarnished) wooden broom handle from the hardware store. This is the style of dowel my grandmother used all her life to make homemade phyllo dough so I am sure that it's a good option for rolling out long thin sheets of dough.
That being said, I find this one a bit difficult to work with precisely because it's so long (the table has to be totally clear or it knocks things out of the way). Plus it's difficult to stretch the dough over it when it's so thin.
A smooth and thin sheet of dough (called the sfoglia in Italian) can be achieved using any rolling pin with practice but I've just chosen to use my French pin instead because it feels most natural to me.
Rolling out pasta with a machine
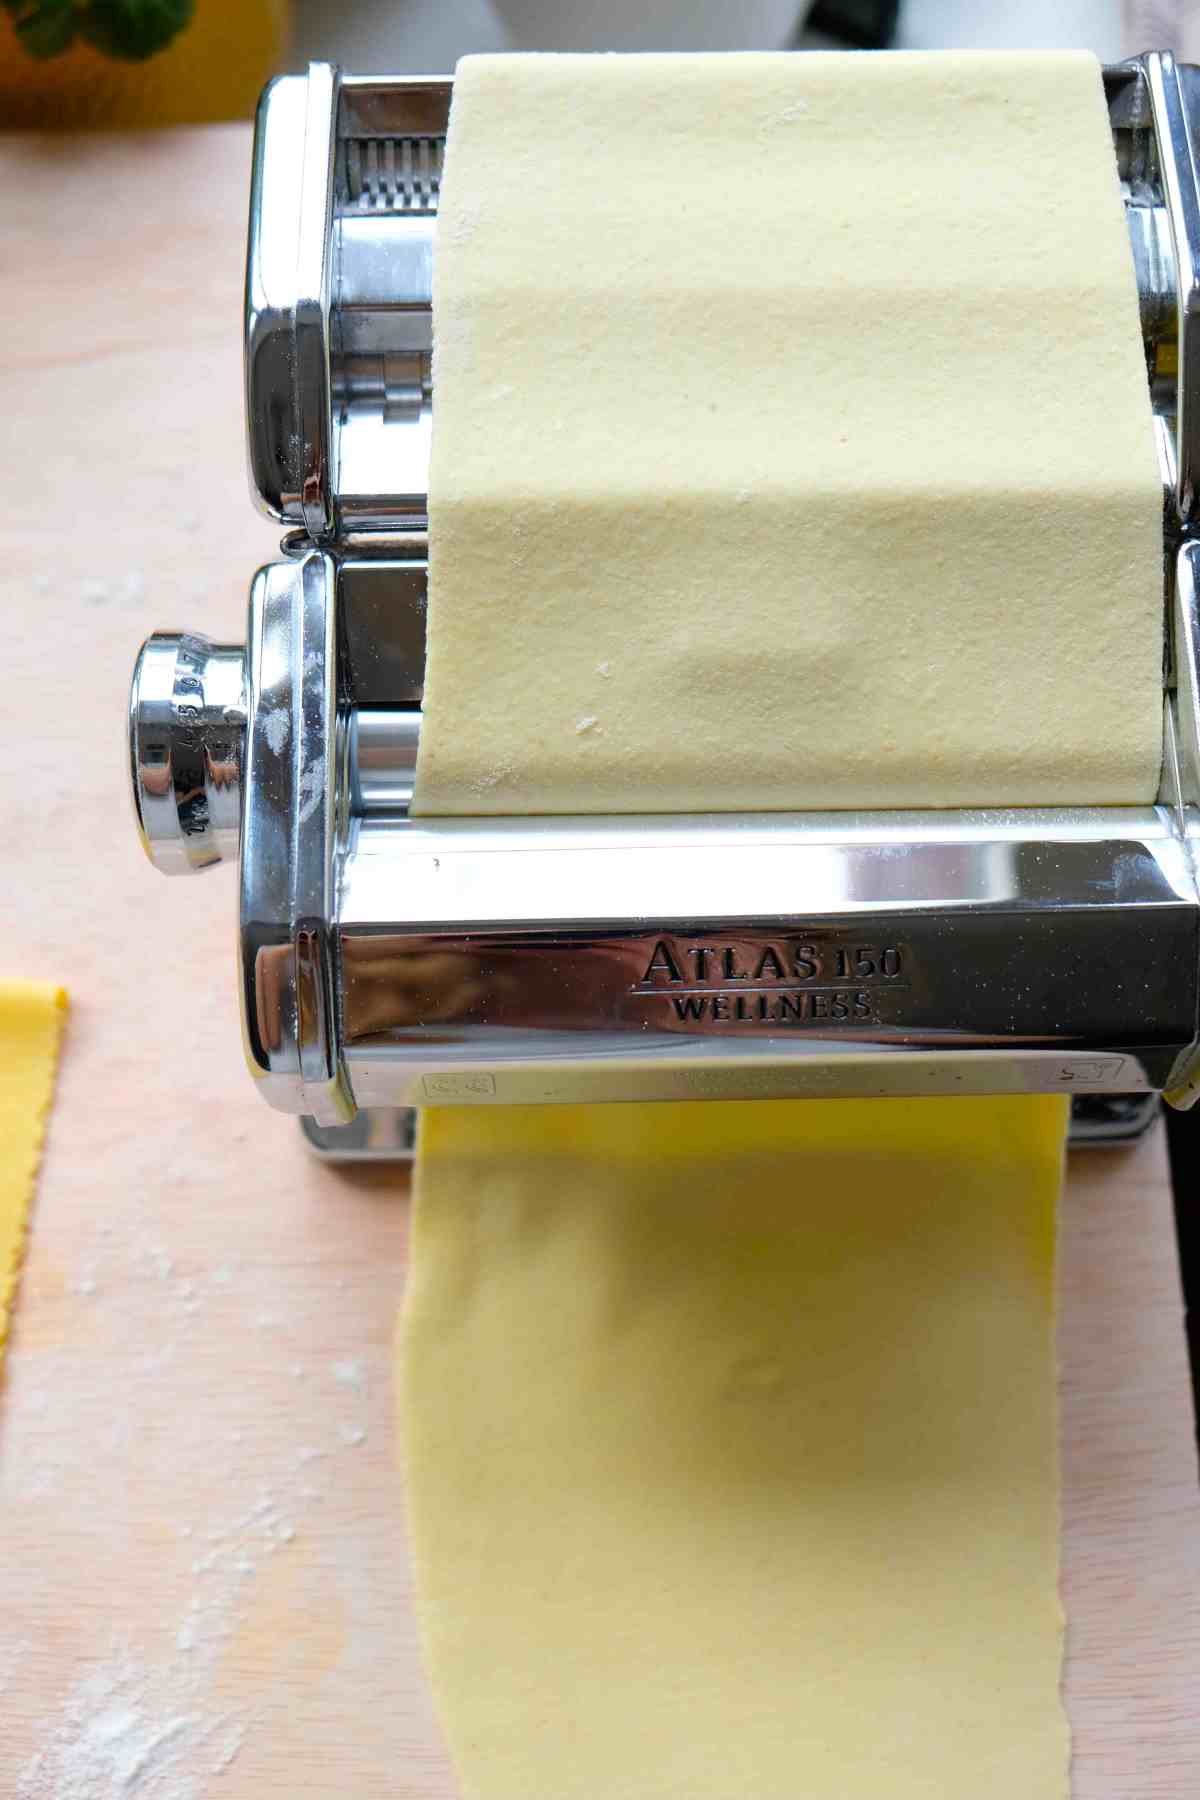
Rolling out pasta with a pasta machine might seem foolproof but it actually isn't and there are some key things to keep in mind so you can avoid frustration.
- The basic idea is that you cut the pasta dough into pieces, and feed those pieces into the pasta machine, starting at the widest setting (usually 1 on the machine) and turning the knob higher each time you feed the dough through until you get to the right thickness for the type of pasta you want. There are different indications for different types of pasta given below from information provided by the manufacturer of my pasta machine.
- In order to improve the texture and elasticity of the dough, it's a good idea to feed, press and refold each piece at least twice on the lowest setting so it gets very smooth and elastic. Then proceed to turn the knob each time to your desired level.
- Keep in mind is that you may be tempted to keep feeding the dough in, even as it gets bigger. If you do this the dough can get difficult to manage - if it's too long it can stick to itself, and if it's too wide it can get pinched by the edges of the machine and get crimps in it as shown in the photo below.
- Cut the dough into smaller pieces as you go. Usually for 100 grams of flour (1 serving) you will end up with about 4 pieces. Don't hesitate to cut the dough if it starts to be difficult to work with.
How thin to roll pasta dough using a machine
Since a pasta machine presses instead of stretching, it doesn't help with gluten formation. This can result in a dough that's less elastic than hand-rolled dough.
As such, rolling the dough out to the thinnest setting on your pasta machine ( can result in a dough that's really loose, floppy and lacks structure.
This depends on the recipe and ratios used, but in general I've found that the same dough made with tipo 00 and egg comes out very thin and soft when pressed to the thinnest setting on my Atlas pasta machine.
These are the widths of the Atlas pasta machine given by the Marcato company in their Atlas 150 manual. Keep in mind that different machines will likely have different settings.
| Number on knob | Width in millimeters (mm) |
| 0 | 4.8mm |
| 1 | 3.7mm |
| 2 | 3.1mm |
| 3 | 2.4mm |
| 4 | 1.8mm |
| 5 | 1.5mm |
| 6 | 1.0mm |
| 7 | 0.8mm |
| 8 | 0.6mm |
| 9 | 0.5mm |
They also provide recommendations on thickness for different types of pasta, for example they recommend number 4 for spaghetti or linguini, 6 for pappardelle or ravioli, and 8-9 for tagliolini or capellini.
I can't recommend exactly which level to roll the dough out on as it depends on the recipe and machine used, but it's something to keep in mind and be aware of.
The more you make pasta yourself, the better you will be able to feel out exactly how you like your pasta. This is just one extra data point to keep in mind.
Pasta rolling advanced technique: lamination
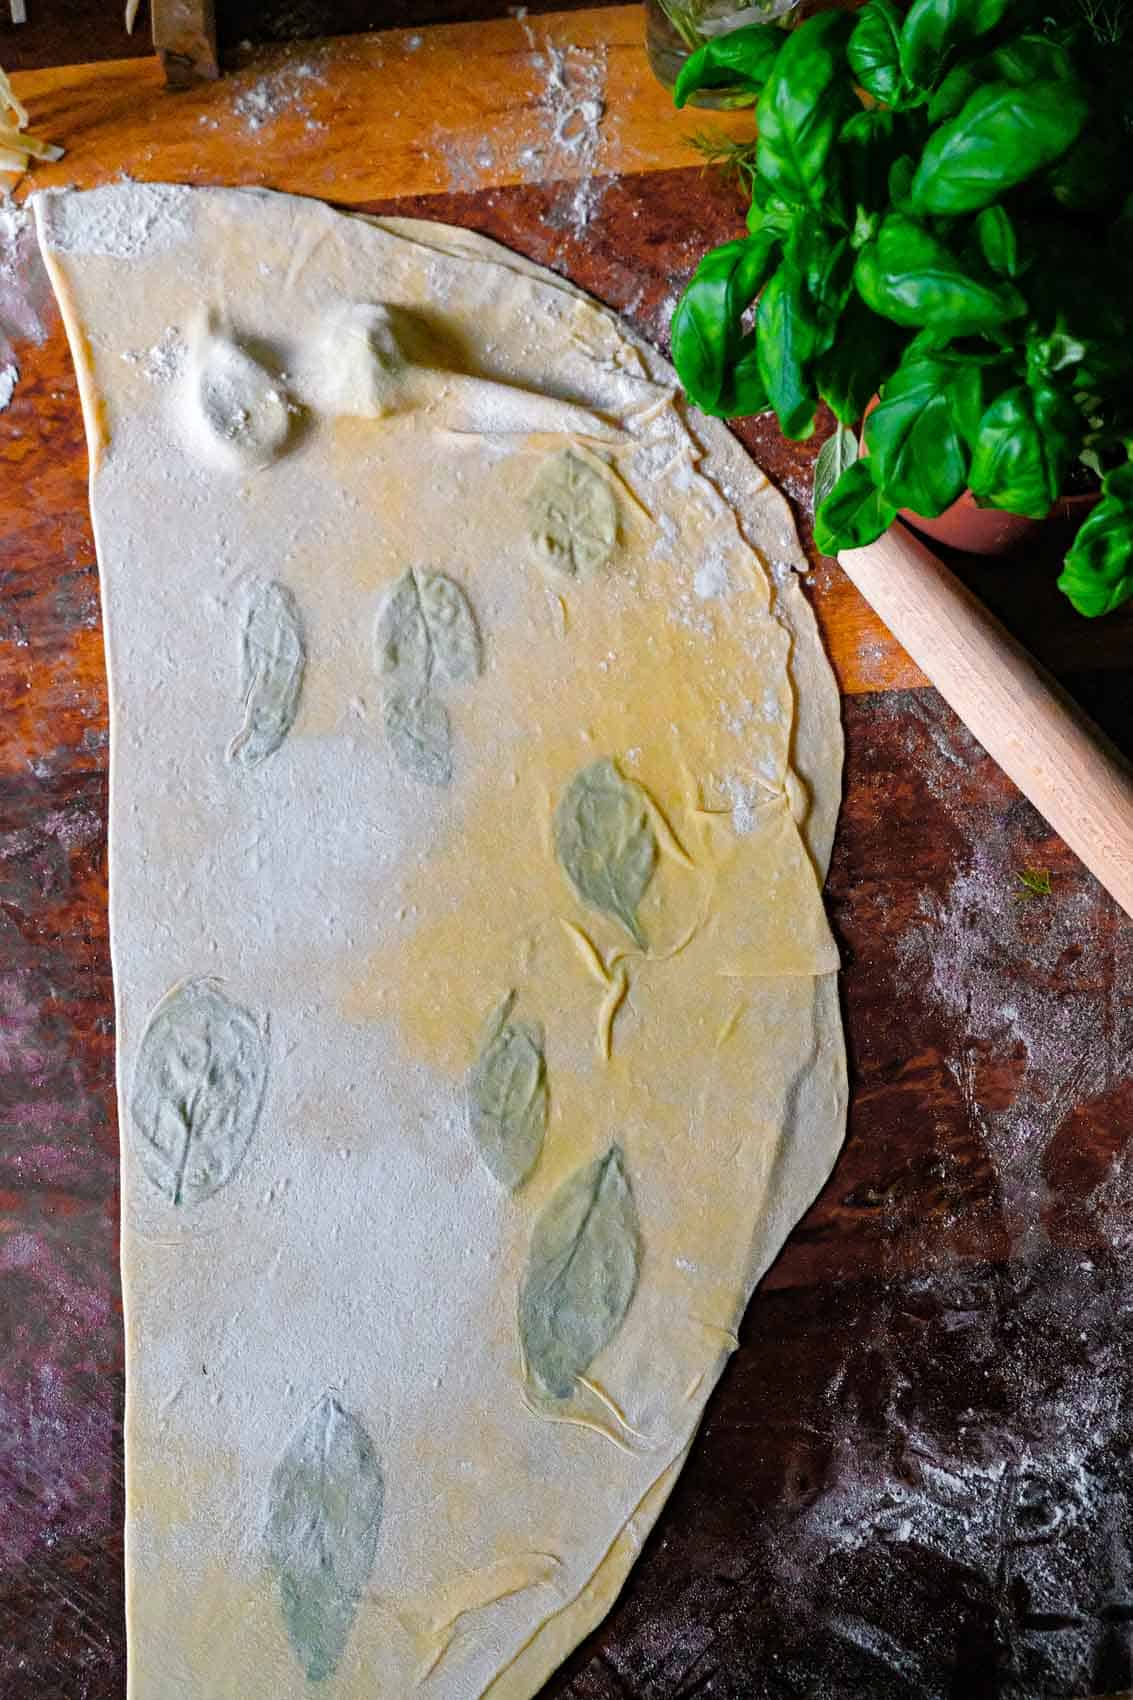
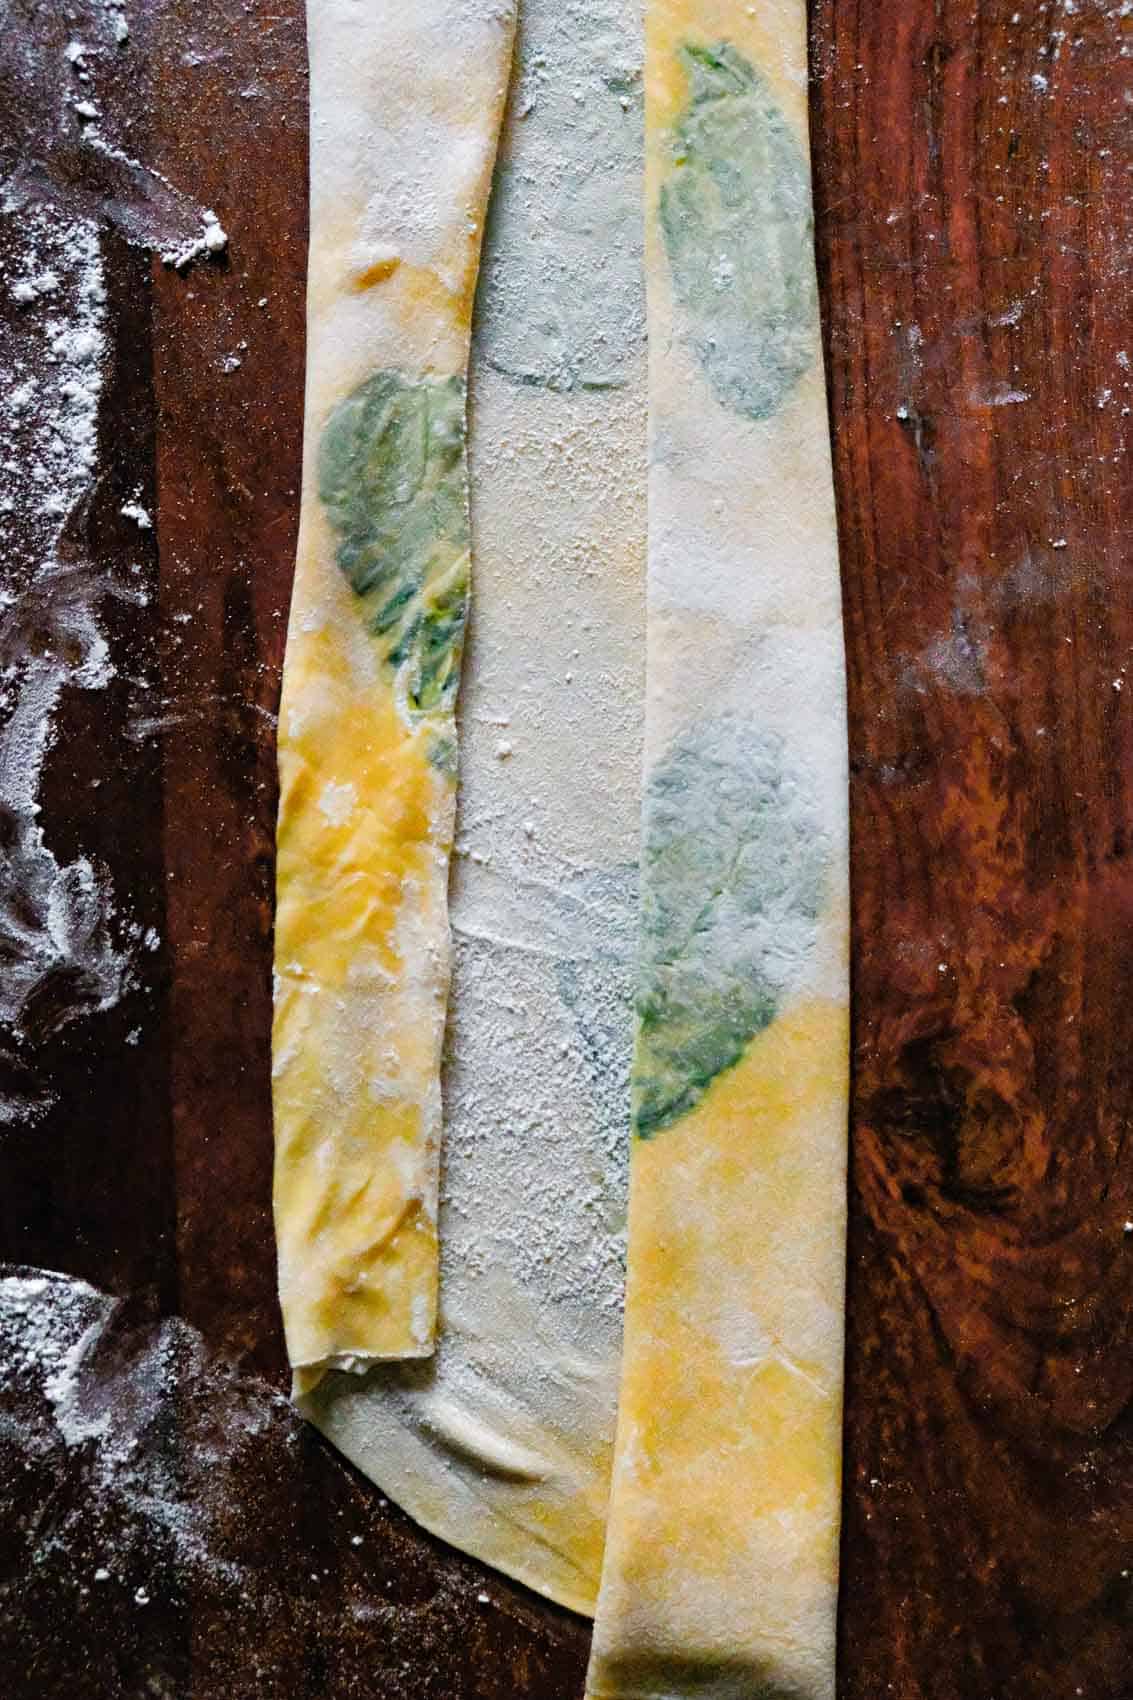
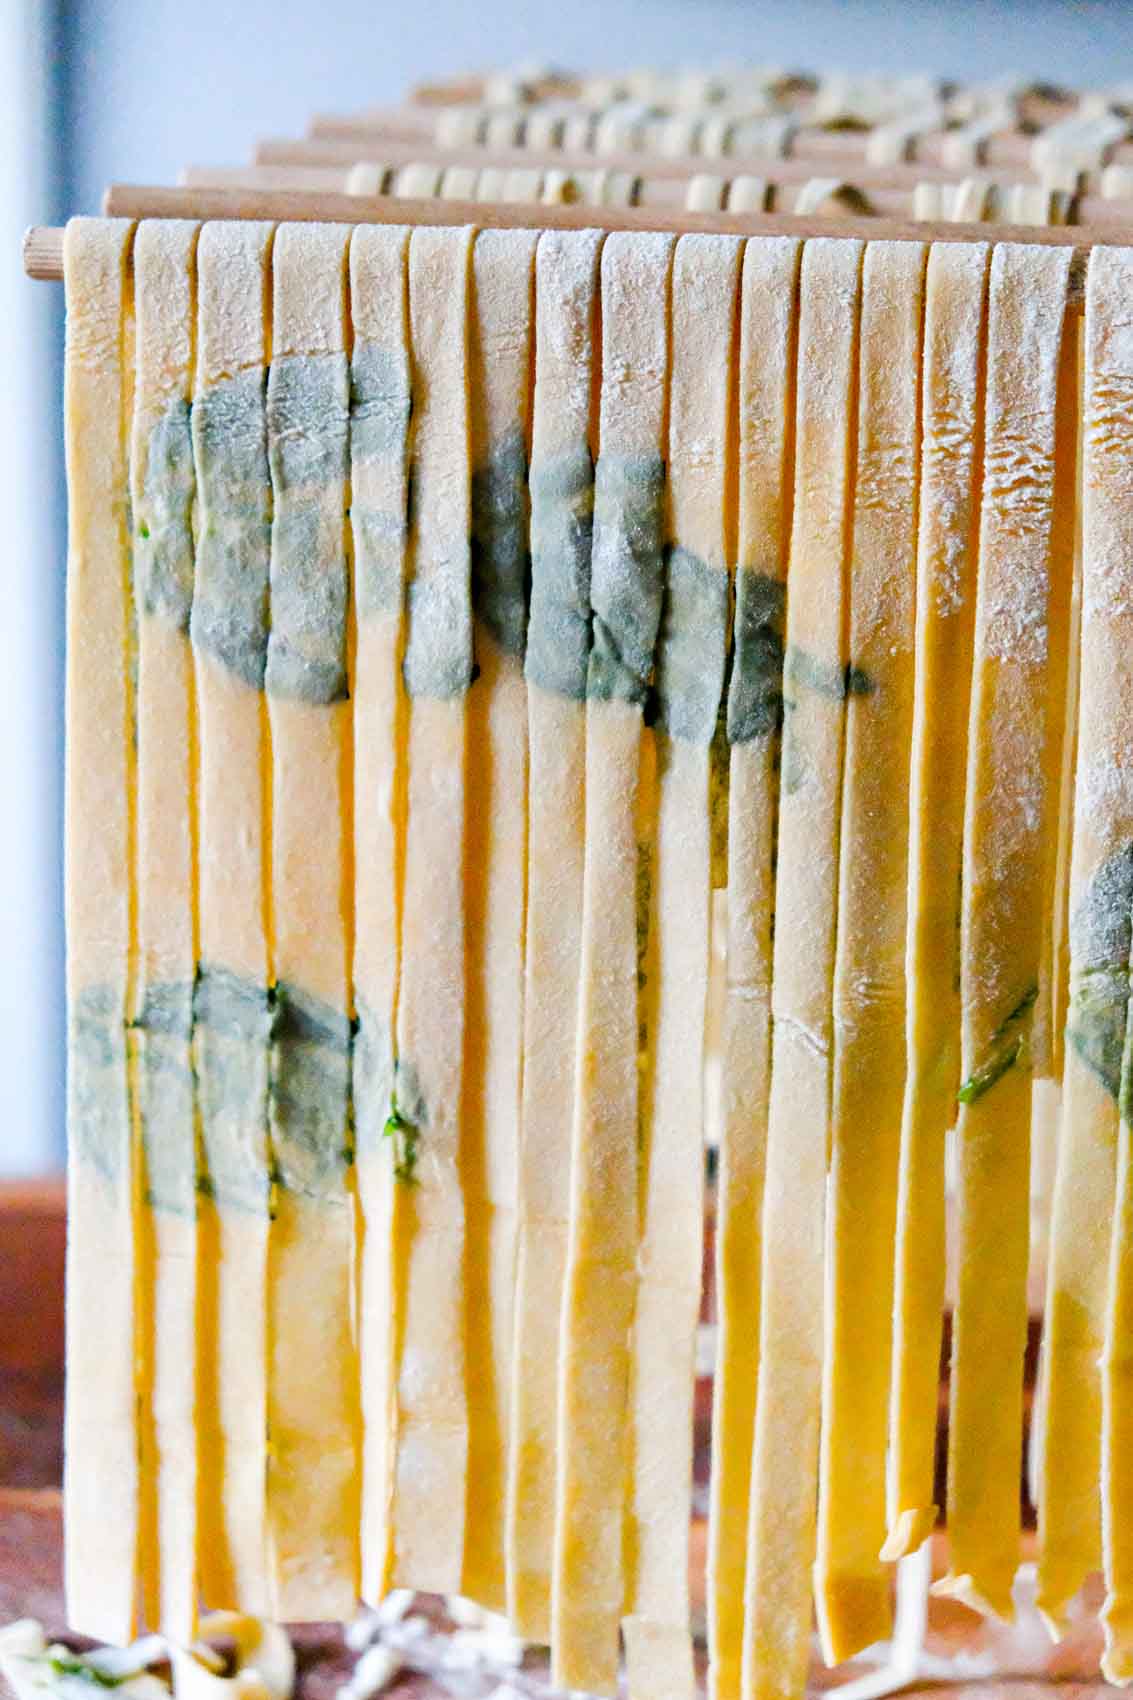
Lamination means folding dough over itself again and again. This can be done to laminate with butter (when making puff pastry for example) or to laminate pasta dough with herbs like fresh basil.
You can use other fresh herbs too or even edible flowers.
The process just involves rolling out the dough almost to the thickness you'd want it if it were finished (whether hand-rolled or machine rolled), then place the herbs on the dough at regular intervals.
Keep in mind that herbs add water and too much can impact the structure and integrity of the dough.
After placing the herbs, fold the dough over itself and roll it out again to your desired level.
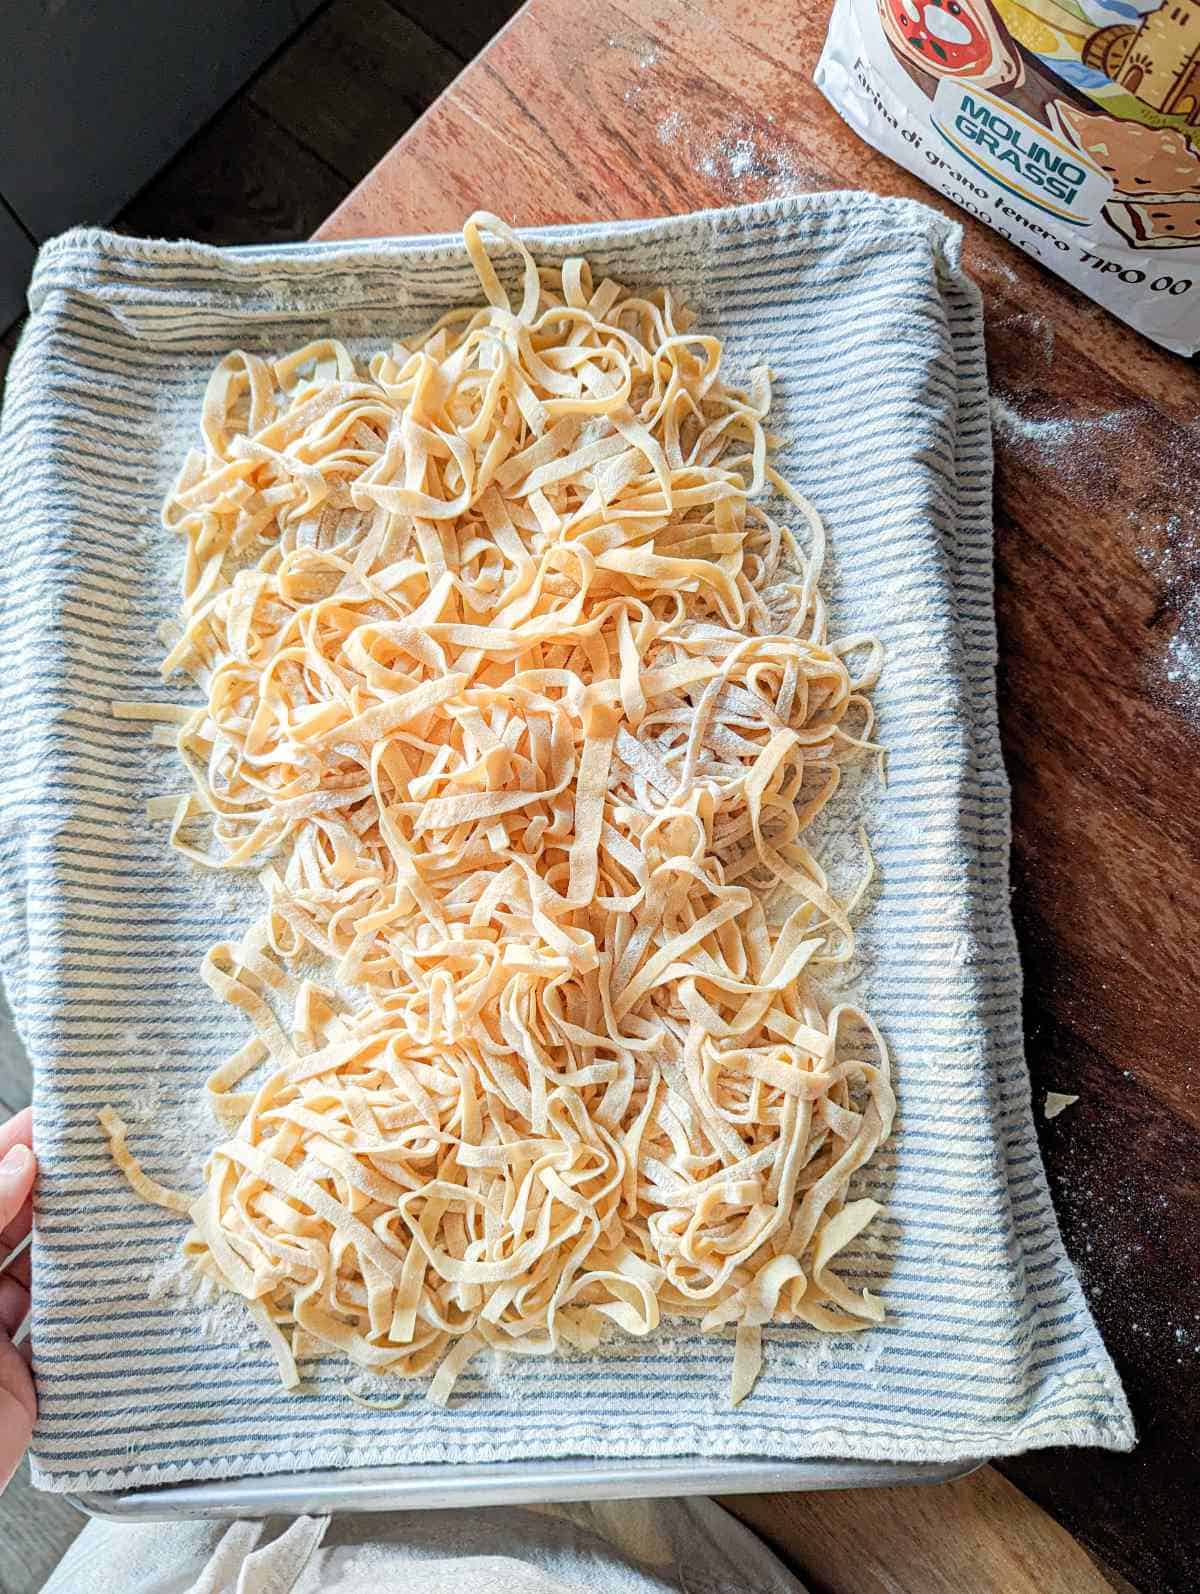
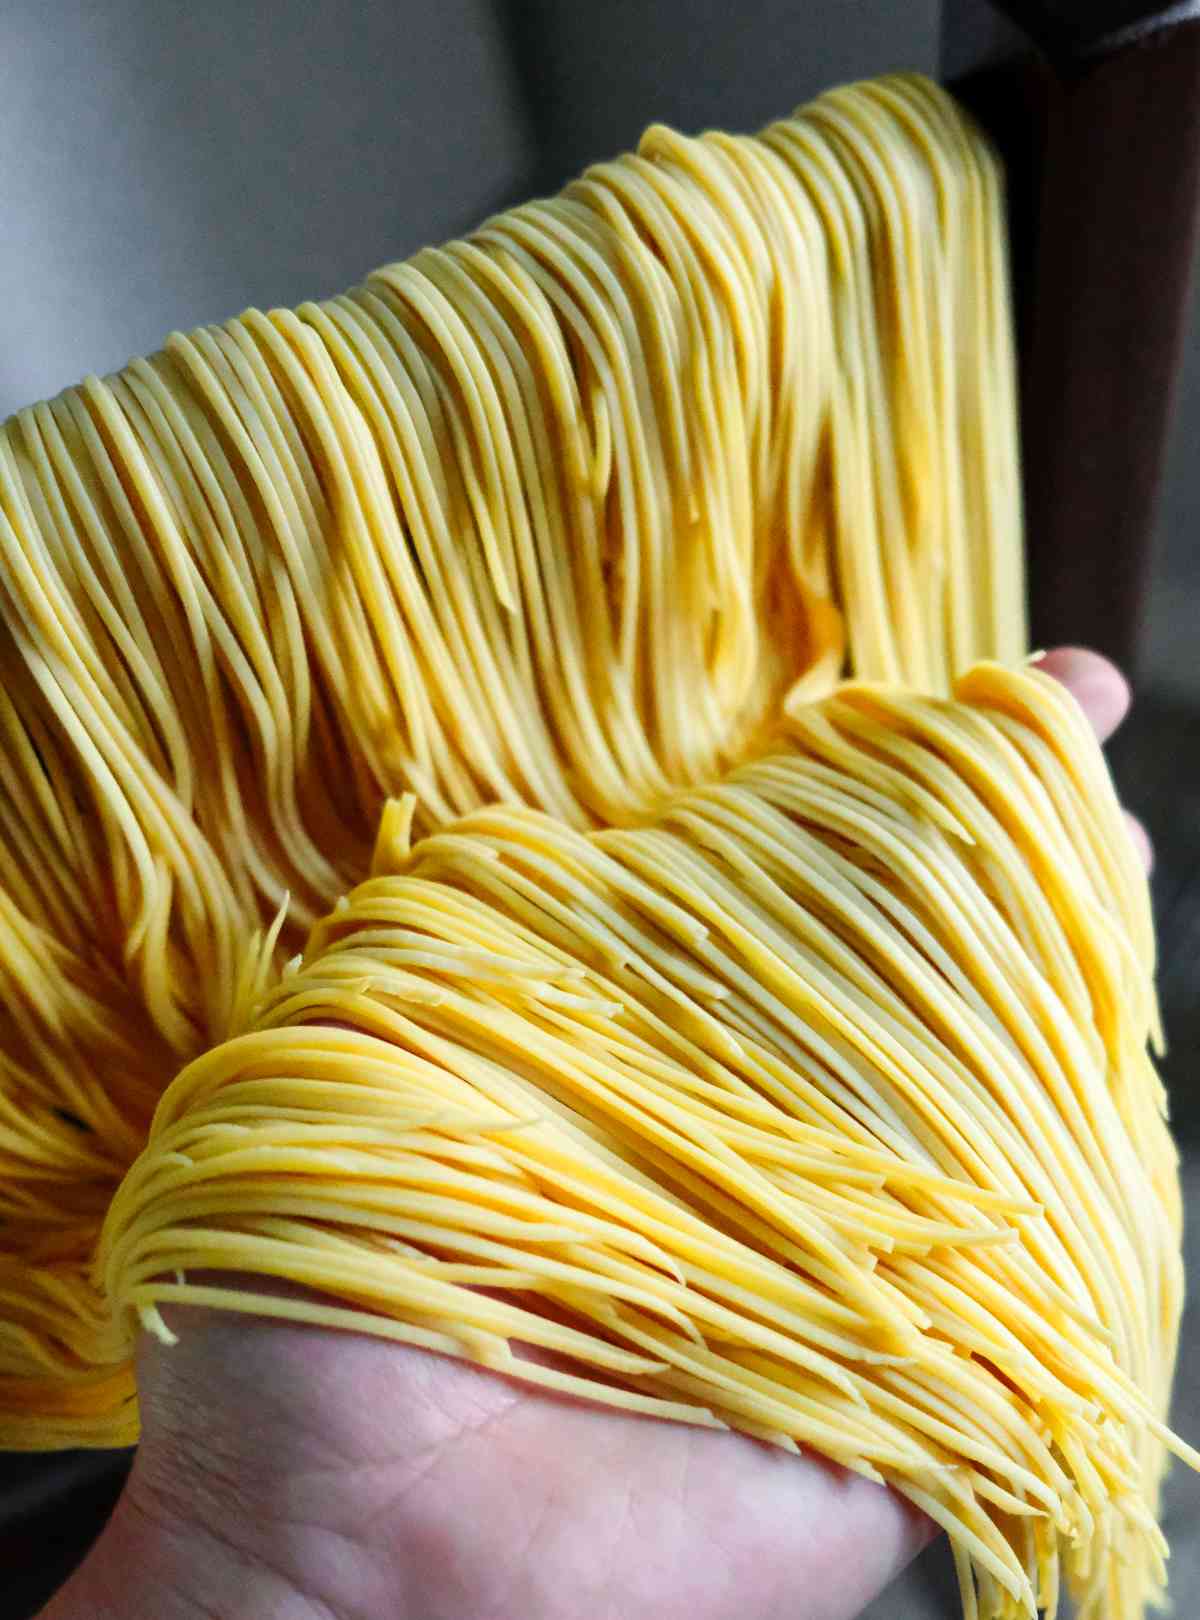
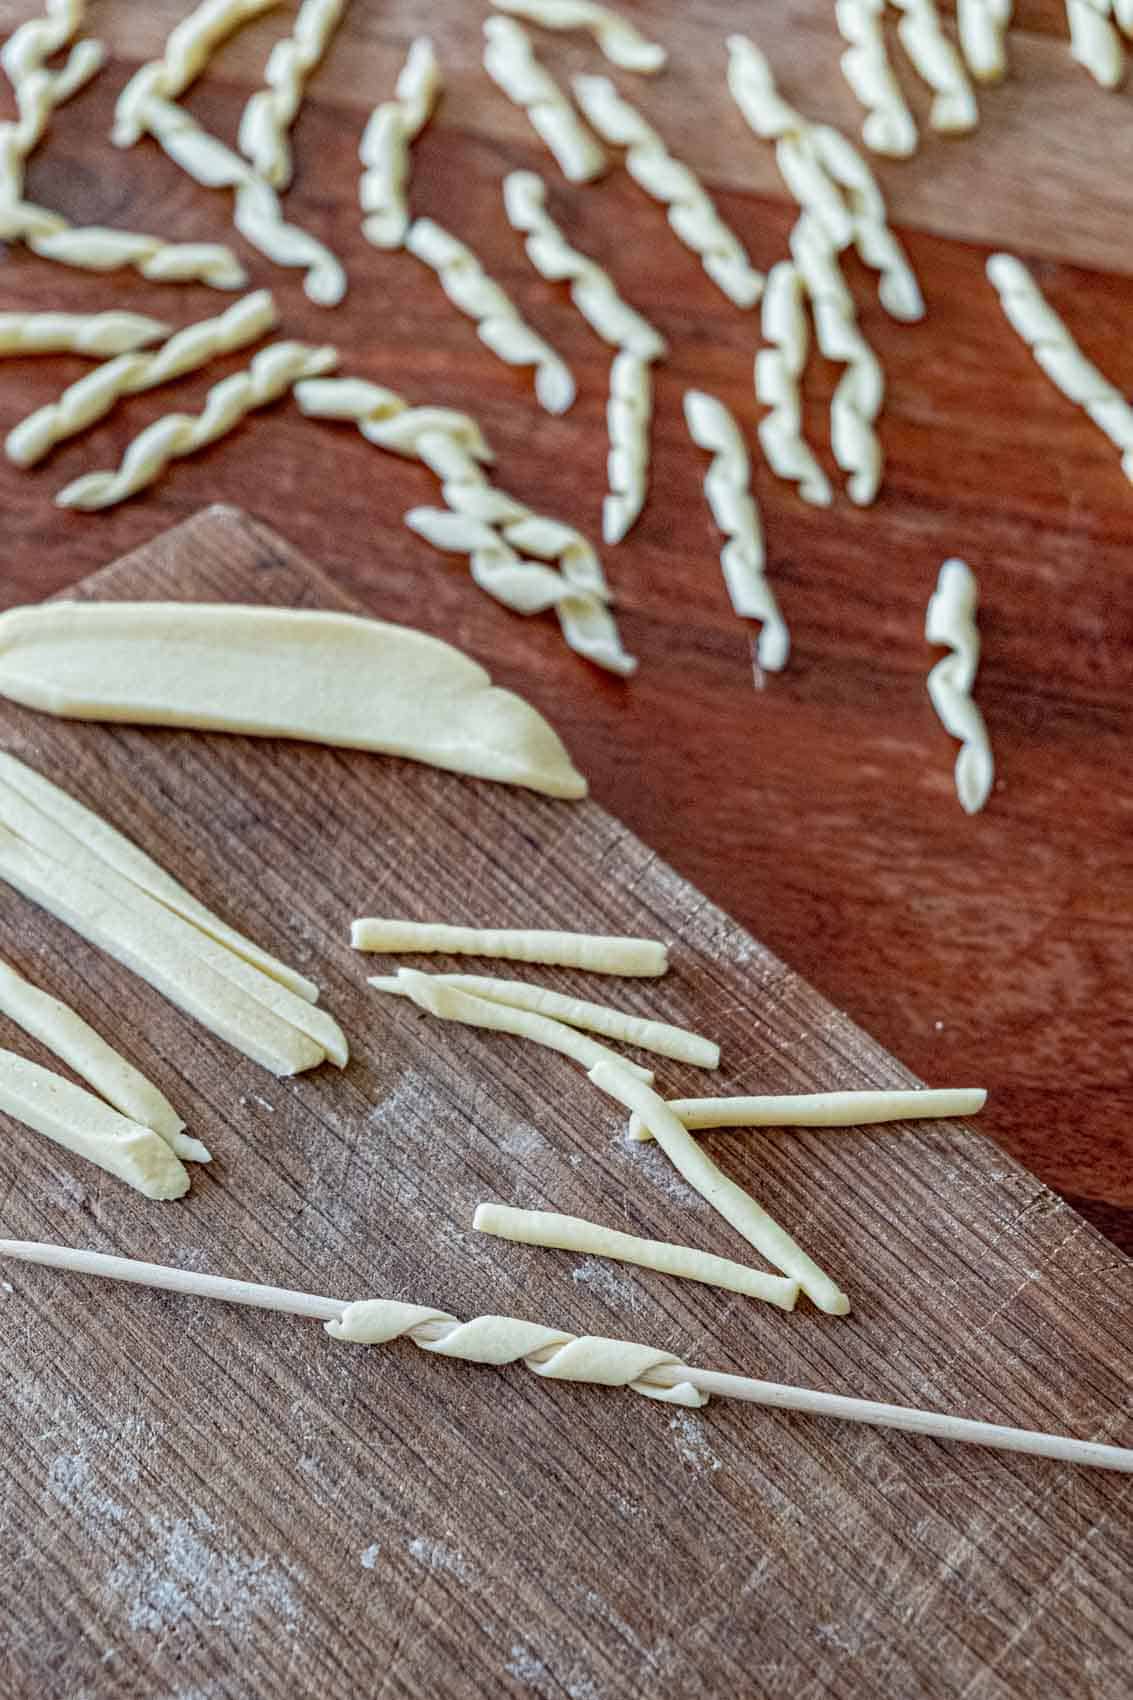
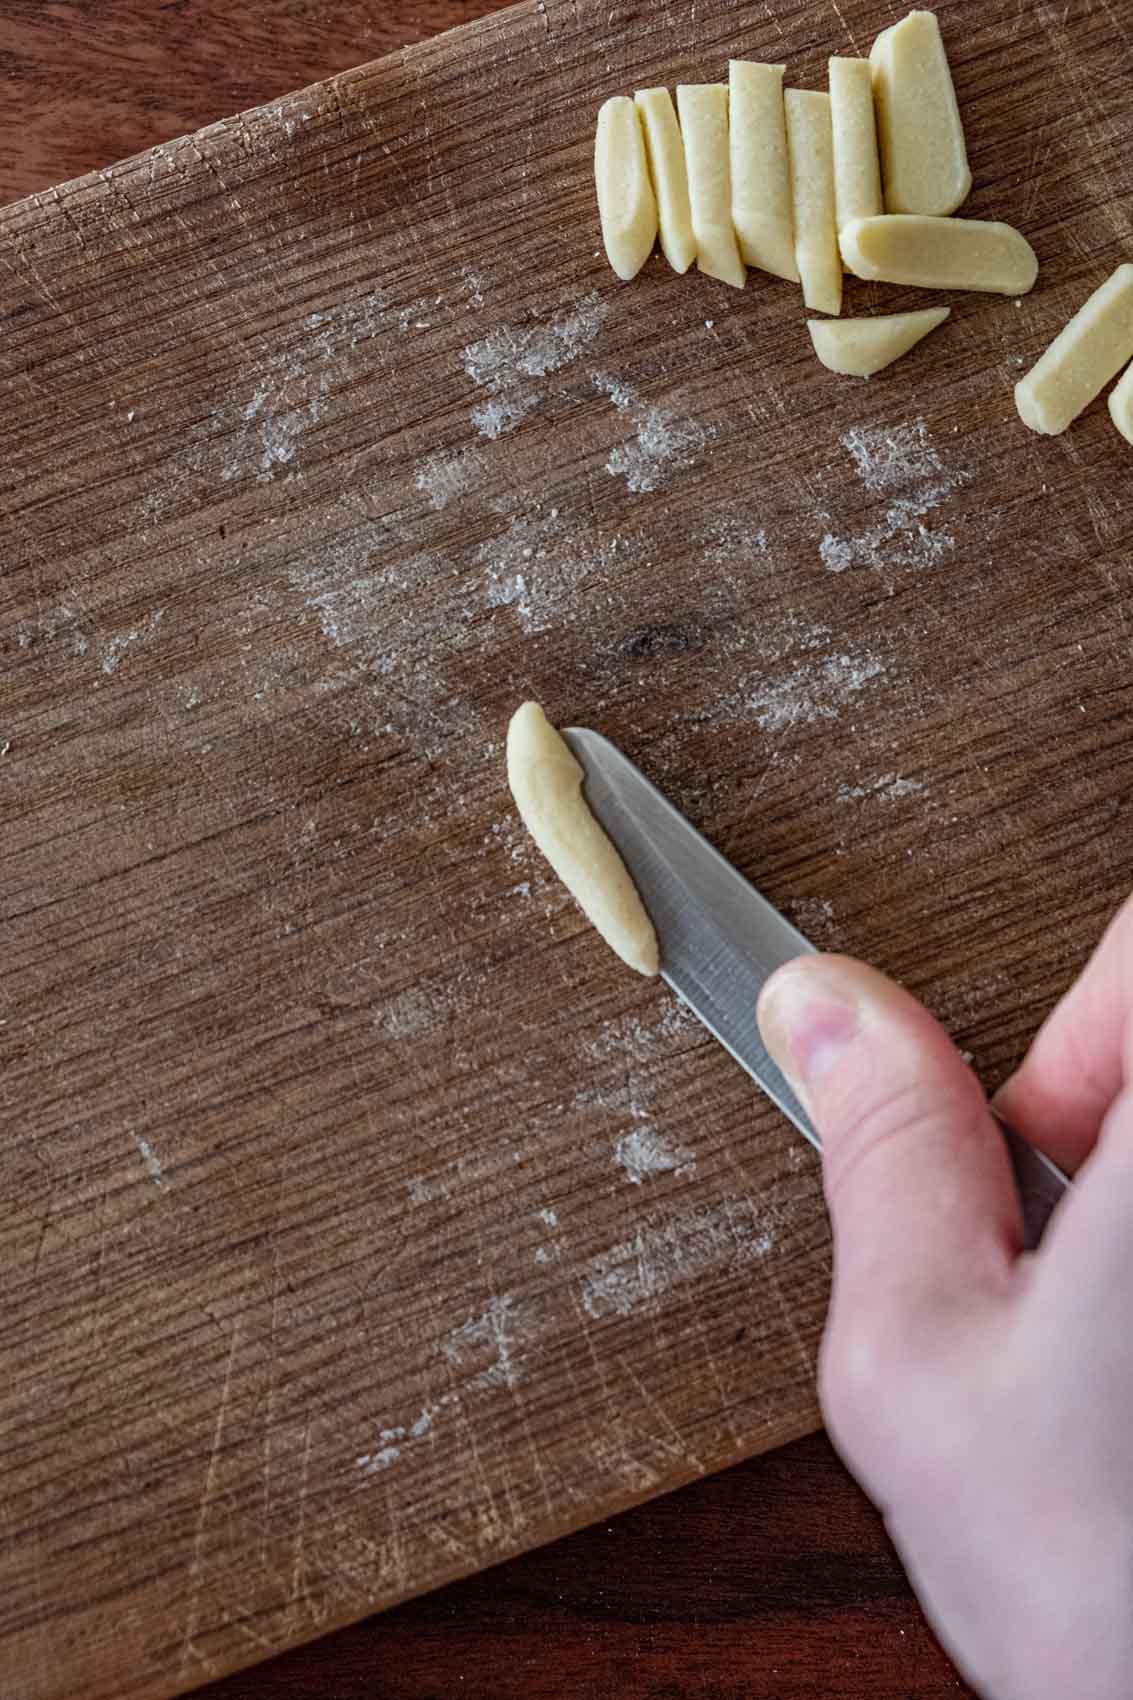
Cutting pasta
One the pasta is rolled out, you can decide how to use it. Cut it into your desired shape by hand or machine
- Make sure the pasta and work surface are very well floured so the pasta doesn't stick.
- An issue you may experience when you start is that your cut isn't straight and the noodles end up with little points at various spots. Not to worry because you won't notice then once the noodles are cooked. If you want to avoid the notches, make sure you cut straight down and don't pivot the blade at all.
- The most hands-on part of cutting pasta is unfurling it - you can make it much easier if you start with well floured pasta. There's also a technique to make this step easier - see next point.
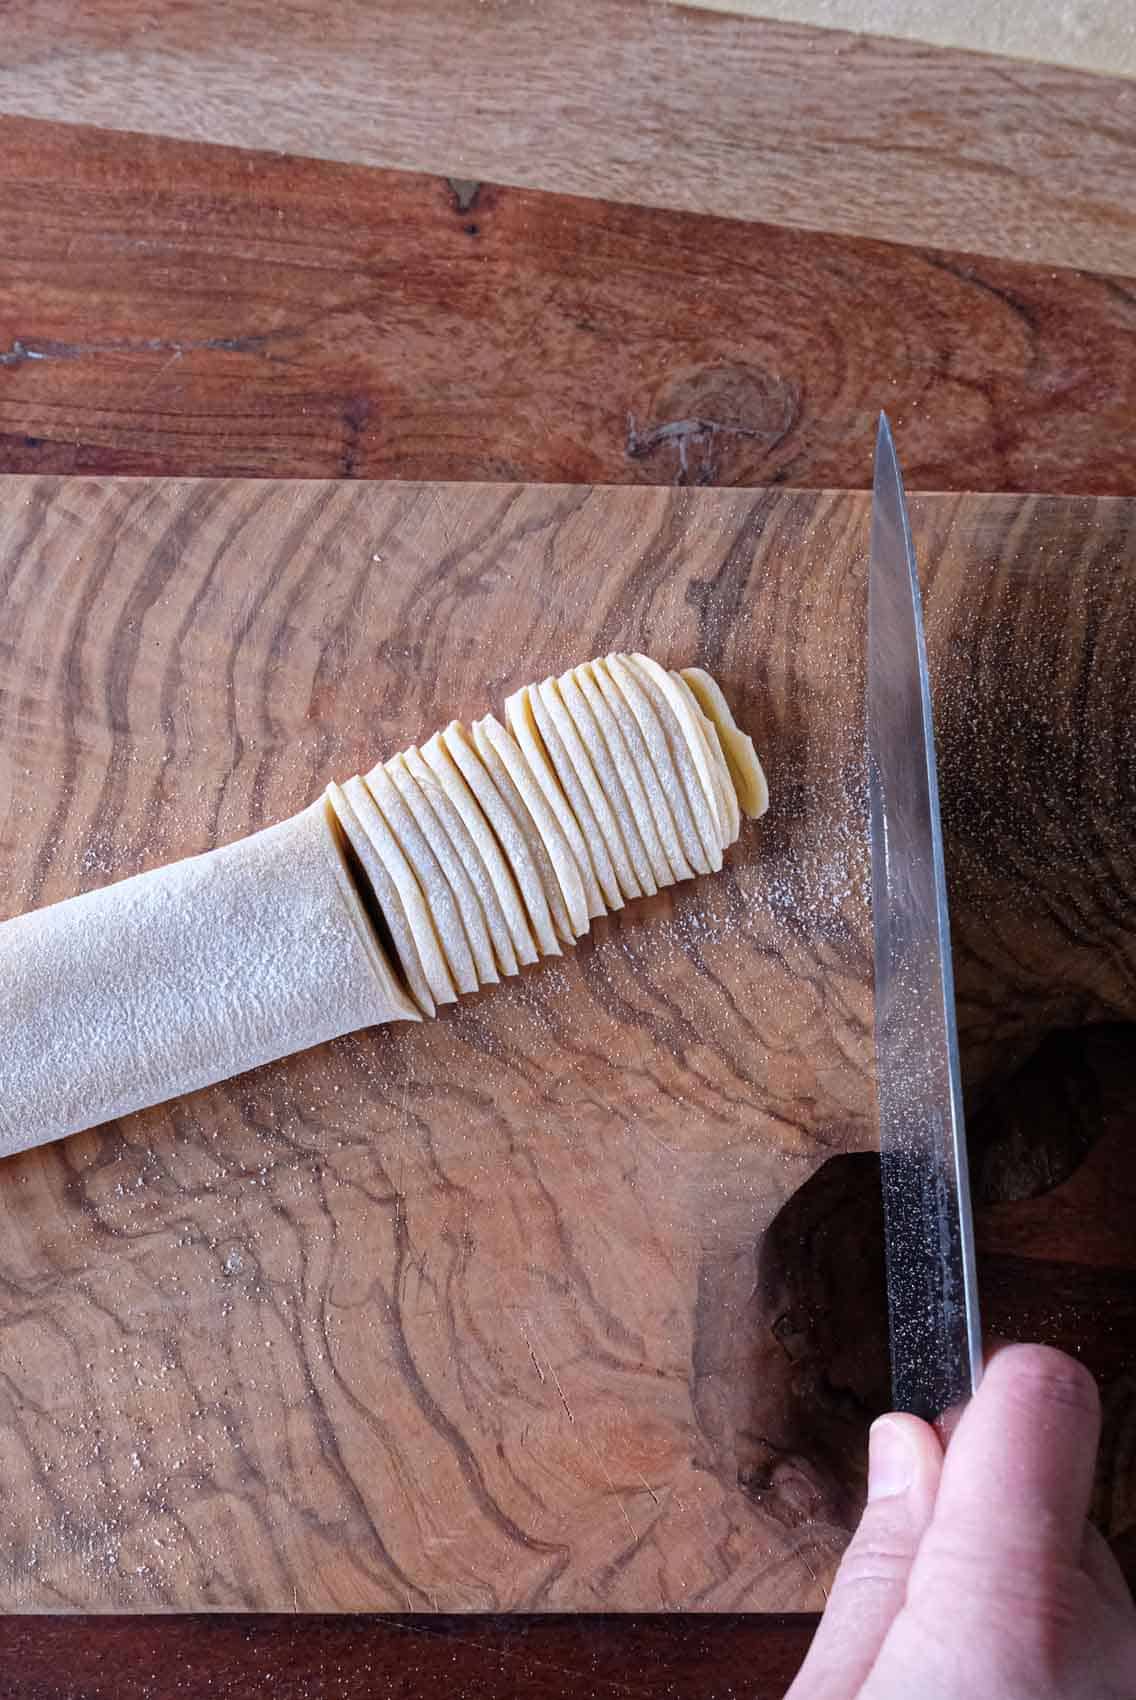
- If cutting by hand, fold the dough up like a carpet and slice to your desired thickness (there are some examples below the next photo set). A nice pro tip is instead of rolling from one end to another like a carpet, roll each end towards the center like you would roll puff pastry to make a palmier / elephant ear. Cut as usual. Once sliced, you can just slide a knife underneath it and lift to unfurl the pasta. You can sort of see this in the second photo below.
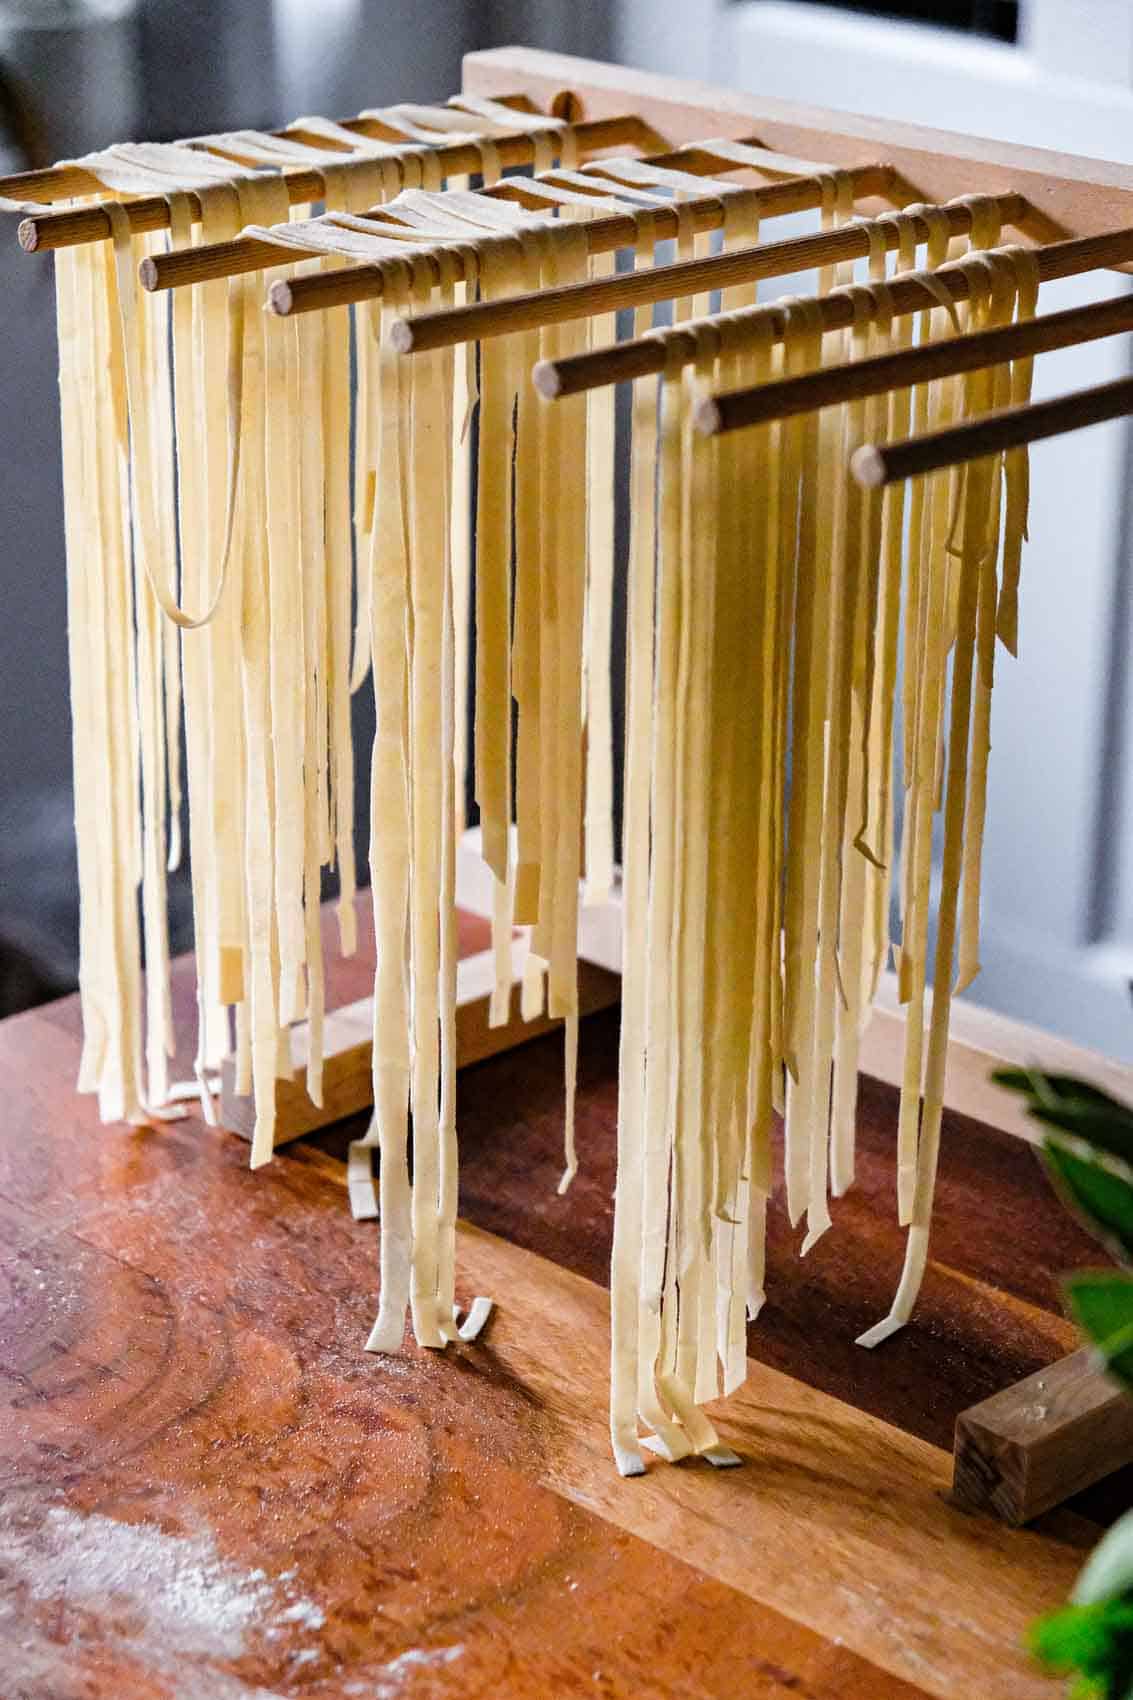
- Be prepared to either cook the pasta right away or have a tray or drying rack out to put it to dry. If the pasta just sits in piles, it is more likely to settle with gravity and stick to itself.

Some examples for cutting pasta:
- Spaghetti, linguini, trenette: 15 cm long (6 inches) by 2 to 3 mm (0.7 - 0.11 inches) thick.
- Macaroni: 25mm by 25mm (1 by 1 inch) squares
- Tagliatelle, fettuccini: 15 cm long (6 inches) by 6.5 mm (0.25 inch) thick.
- Pappardelle: 15 cm long (6 inches) by 50mm (2 inches) wide.
- Lasagna: 15 cm long (6 inches) by 15 cm wide.
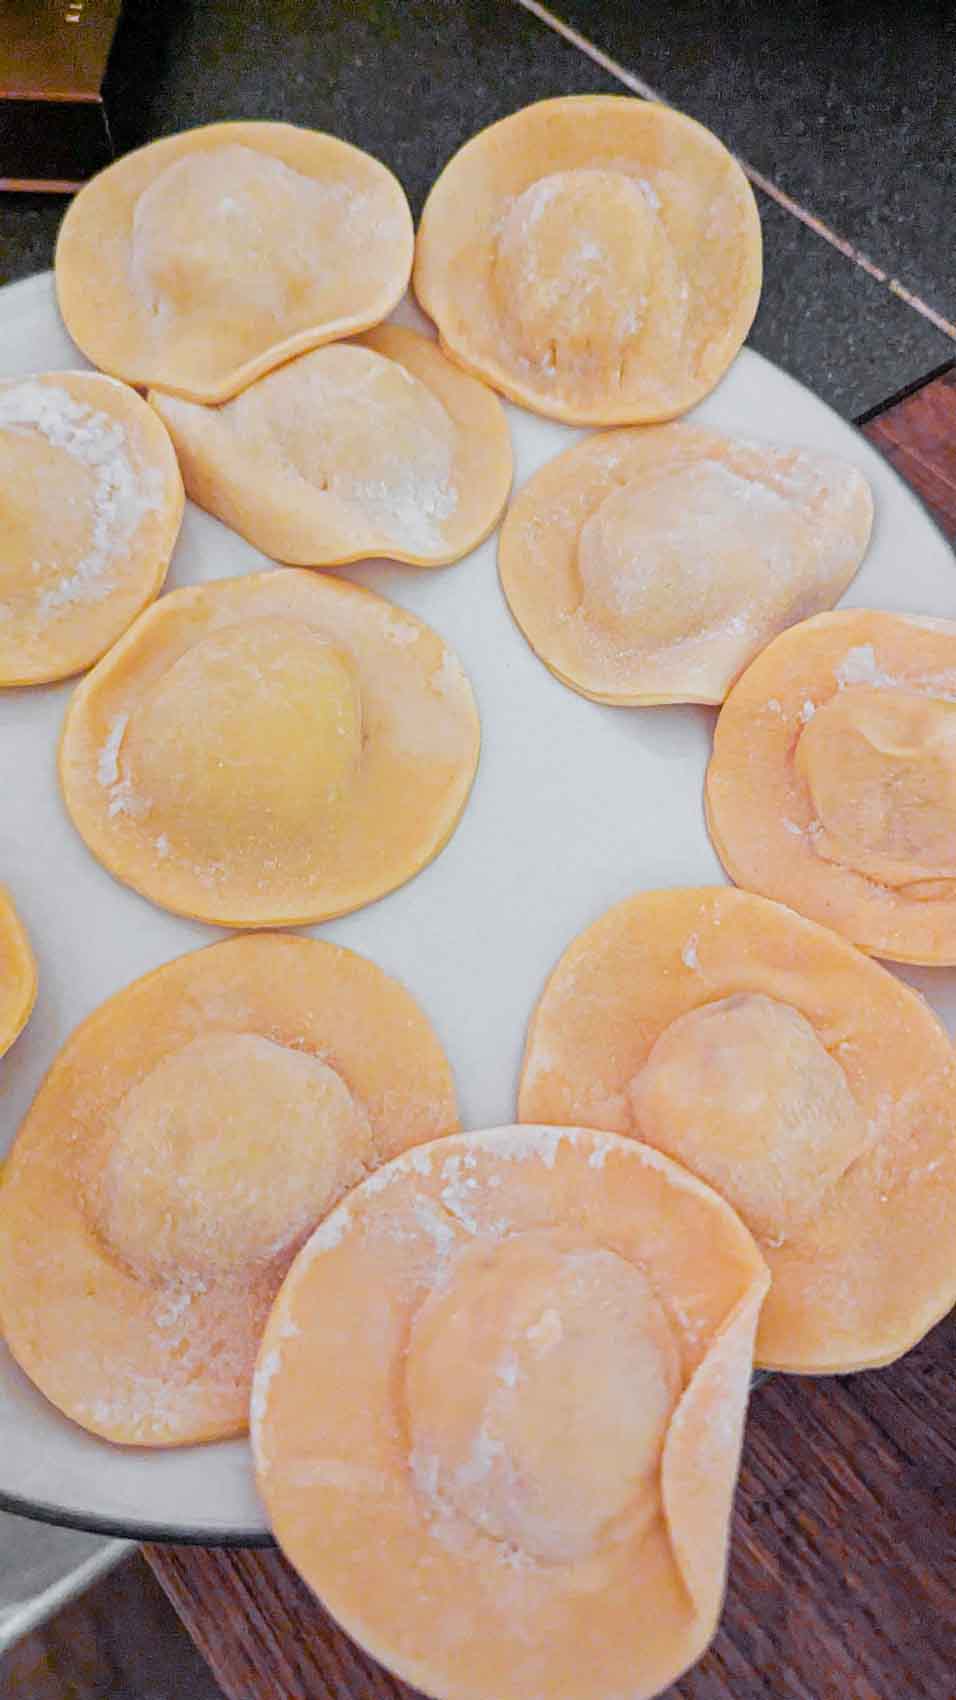
- Ravioli: 45mm by 45mm (1.75 inches by 1.75 inches) squares.
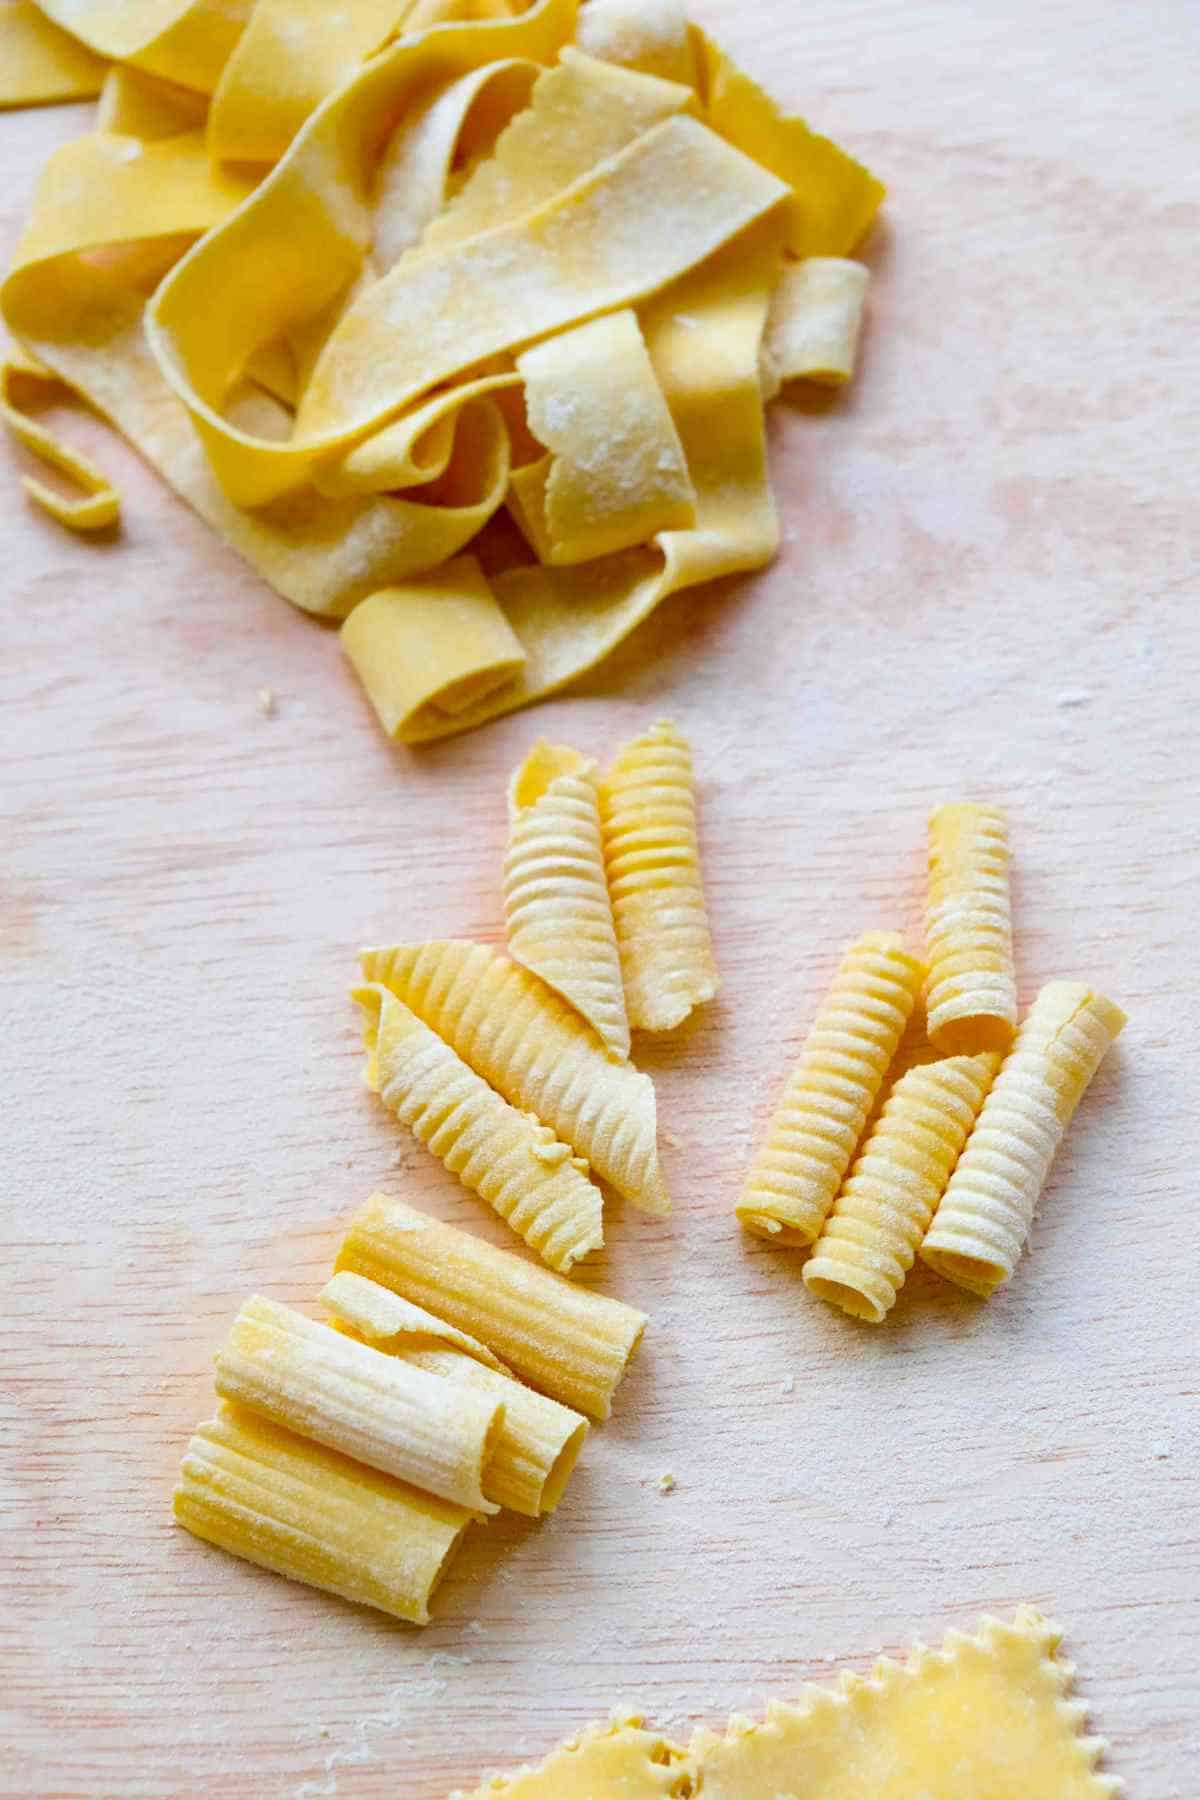
Hand shaping pasta
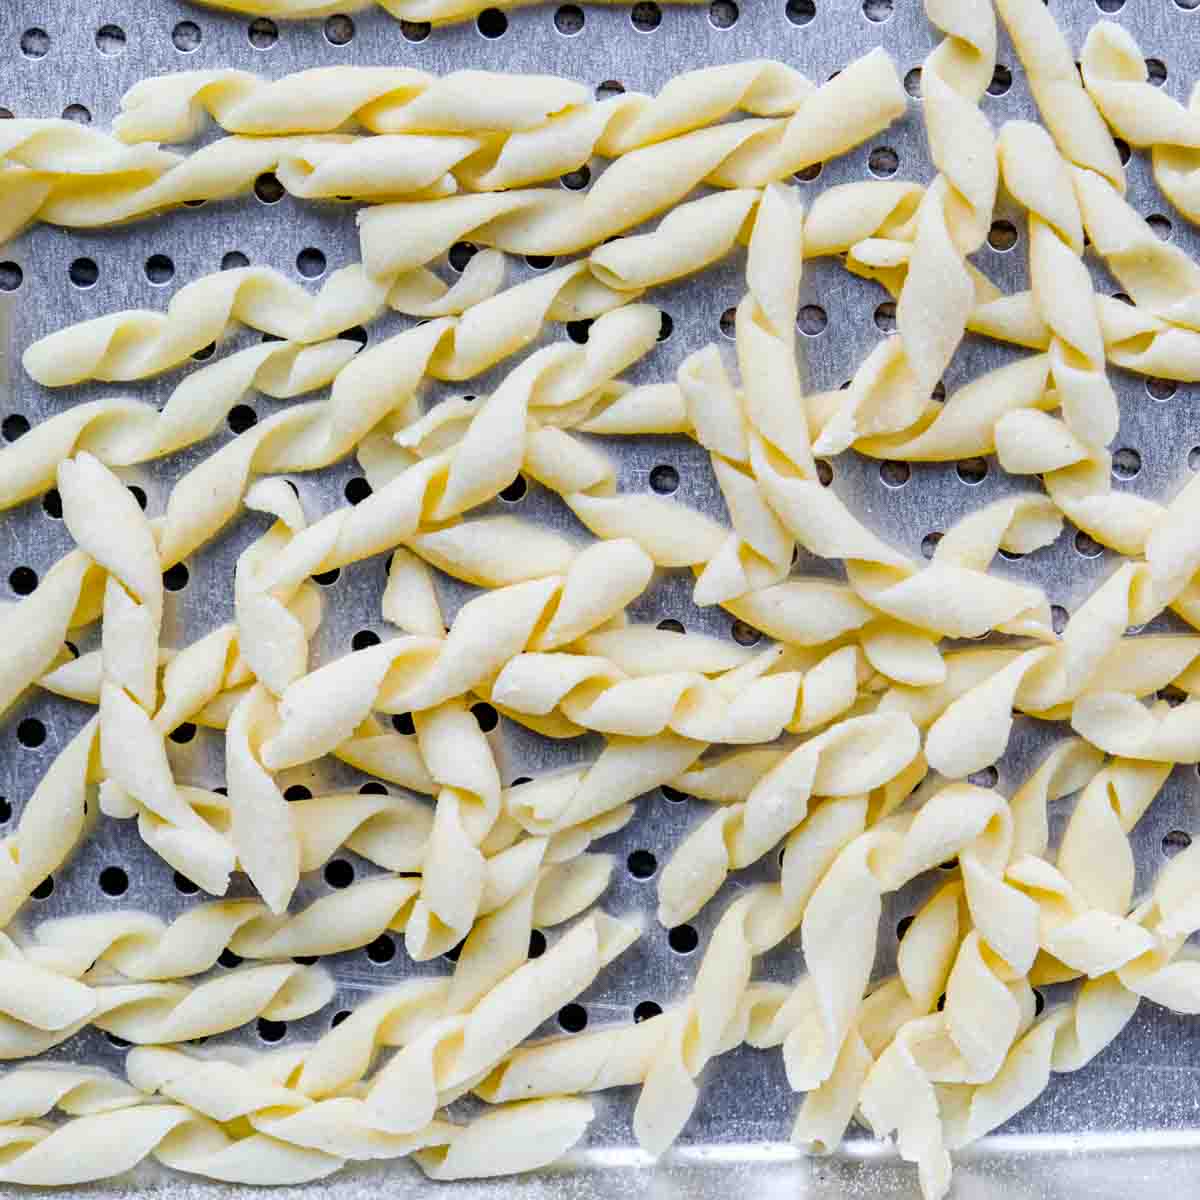
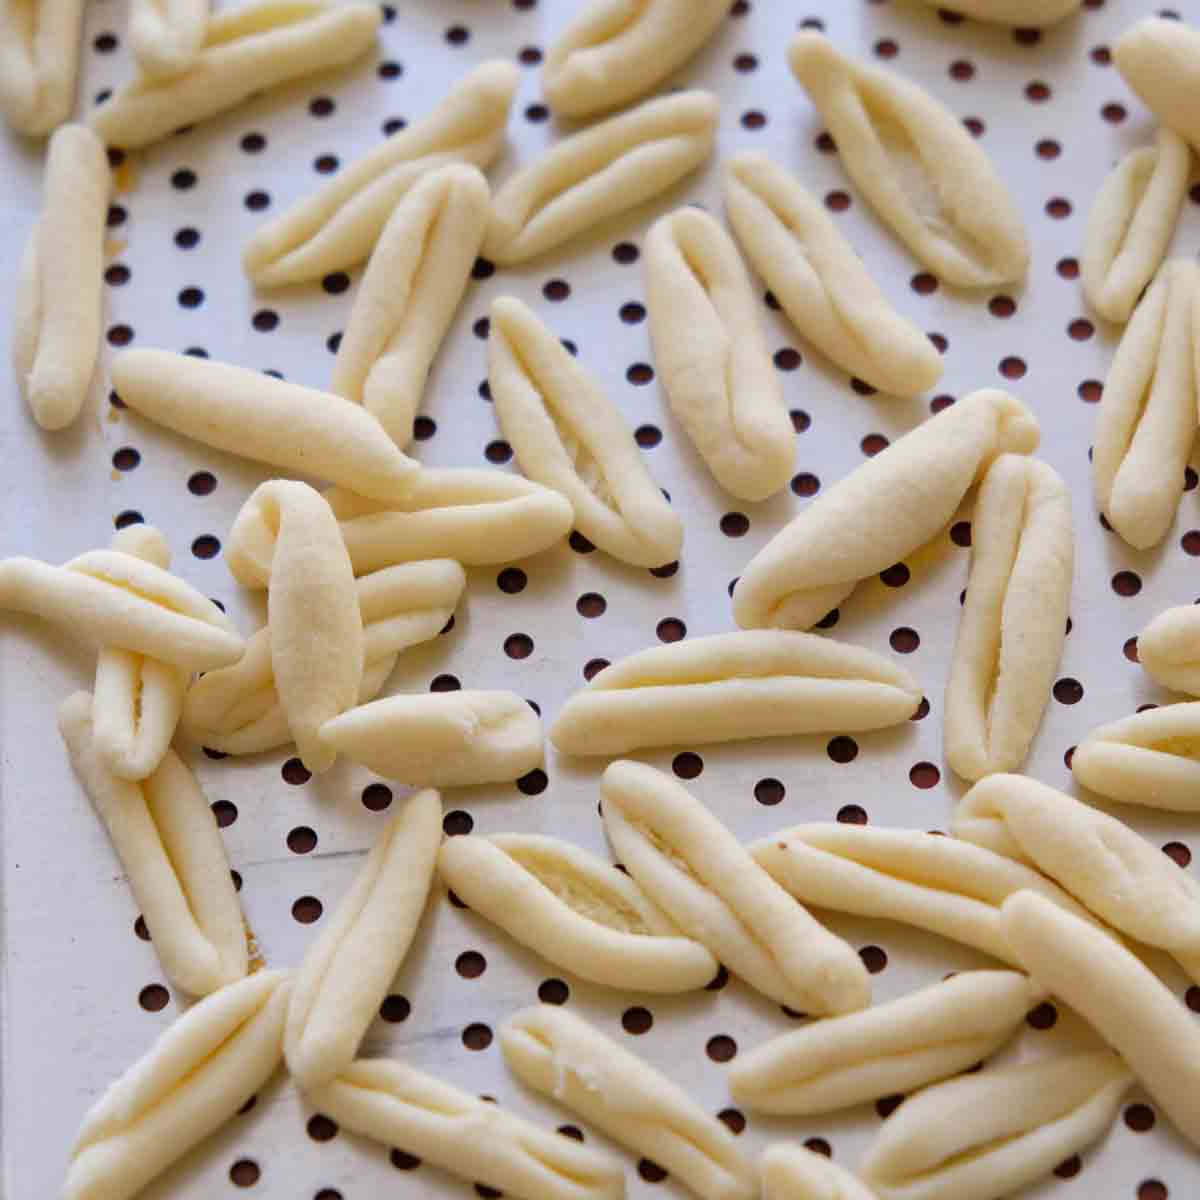
There are a lot of ways to shape pasta by hand. Usually this involves taking a bit of dough and rolling it out into a thick rope, then cutting small pieces off that rope and shaping those into pasta shapes like the ones above.
From top right there is fusilli al ferretto (10cm long / 4 inch strips rolled on a very thin dowel); cavatelli (2cm by 2cm / 0.8 by 0.8 inch pieces cut off a rope of dough are pressed with a knife to make little cavernous shapes; orechiette basically the same size and steps as for cavatelli, but then flip them inside out to reveal the textured inside.
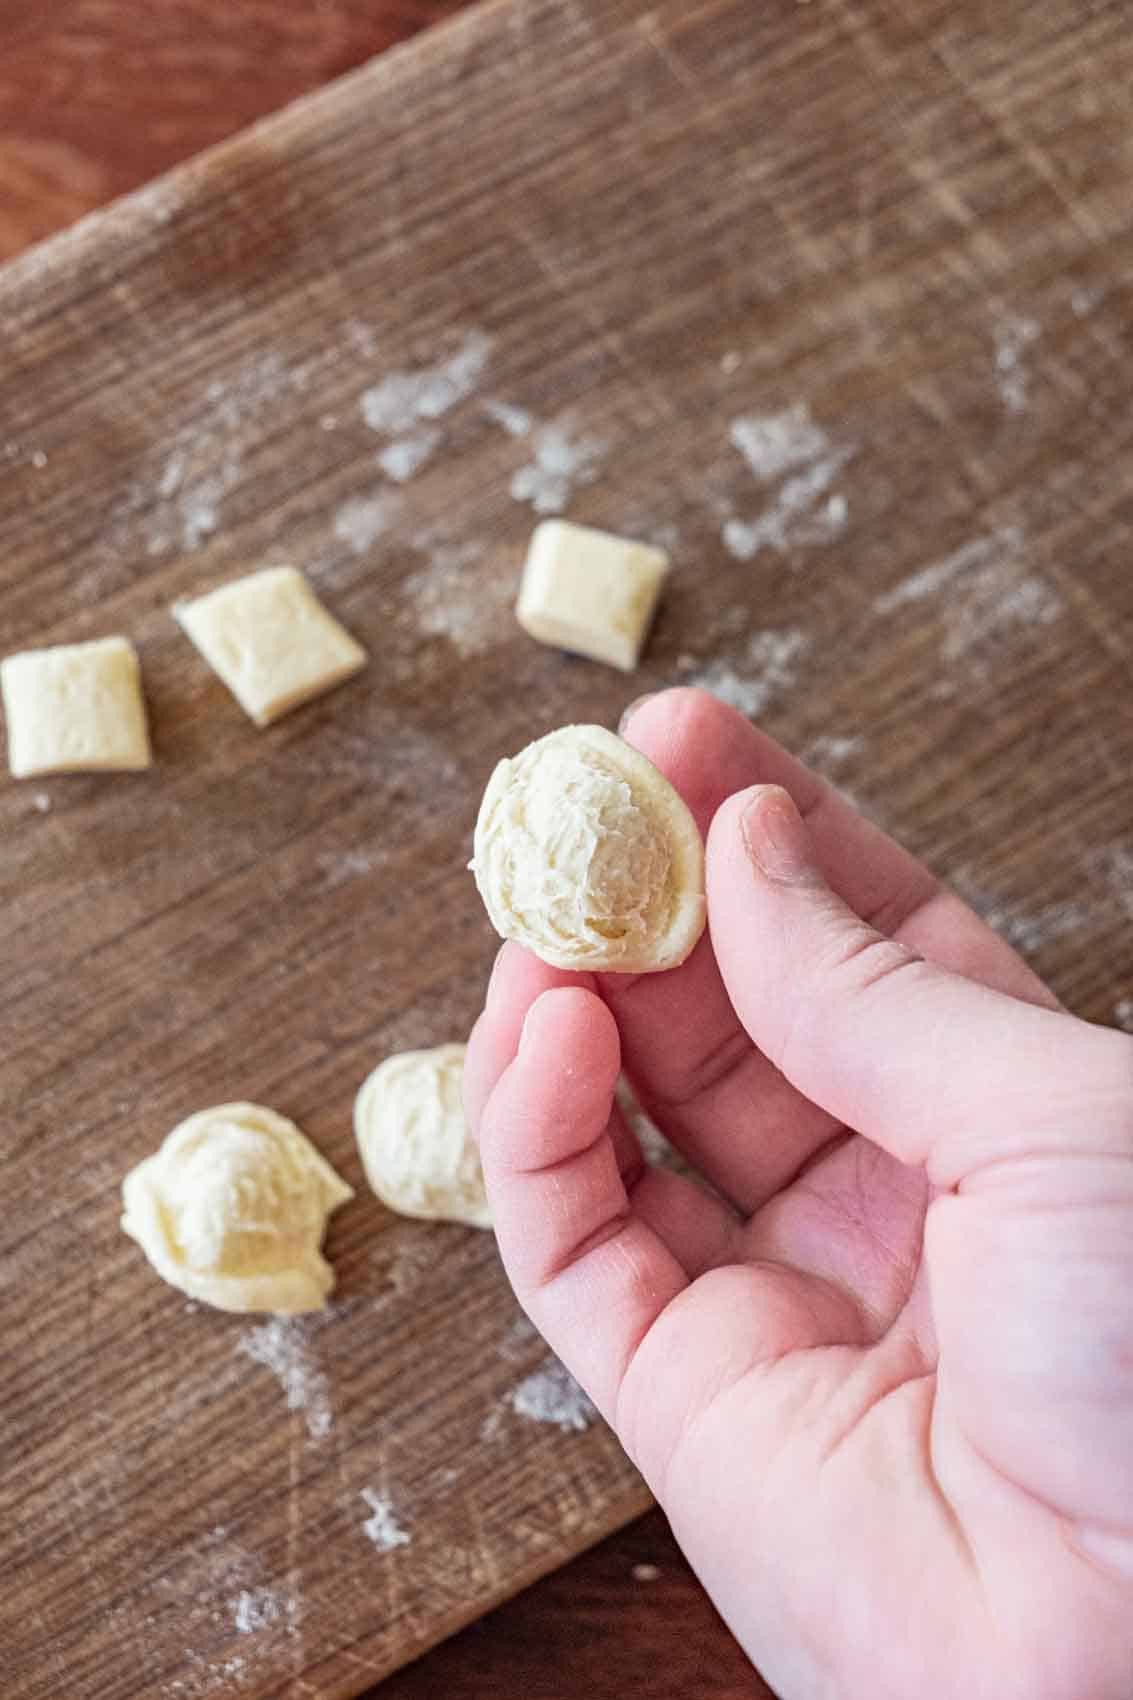
This is just a small sampling of all the possible shapes you can make by hand.
Special tools for shaping pasta
The shaping stage is when most pasta tools can be used, from machines to roll out dough to special boards to make ridges and molds to put pretty patterns on ravioli.
- Pasta cutter wheel (single or double wheel): A pasta cutter makes it easier to cut big pieces of dough without tearing. A pasta cutter with a serrated blade can also cut a lovely scalloped edge. I would recommend this as it makes cutting much easier and if you get a two-sided roller you can also make a beautiful ridged edge on shapes like pappardelle and ravioli. You can use a pizza cutter in a pinch.
- Pasta cutter wheel (many wheels): A pasta cutter with many cutting wheels is called a bicicleta in Italian and can be very useful for making even cuts for shapes like macaroni or ravioli.
- Ravioli press or template: A ravioli press just makes it a bit easier and more consistent to make ravioli. Rather than determining the perfect amount and positioning of the filling and cutting the edges yourself, the ravioli board gives you a nice guide and makes the whole process a bit quicker and more precise. You can make ravioli without this but it's definitely a nice to have. Just pay close attention to the size of the ravioli the press makes and if it's the size you want.
- Gnocchi board: A gnocchi board can be used to give macaroni, gnocchi, cavatelli and other shapes some nice ridges which are better for holding onto sauce.

Step 4: How to store pasta dough
How you store the pasta dough depends on whether it's made with egg or not, and whether you want to store short term (to use within a few days) or long term (to use within weeks or months).
Storing egg dough
Being made with eggs, egg pasta dough contains a yellow pigments called xanthophyll pigments which can oxidize and turn brown as they sit. The effect is faster at room temperature (within as little as two hours but I've gone as long as 6 without seeing a big difference - your mileage may vary).
It also happens if you store the egg dough covered with cling film in the fridge - usually within 24 hours at most but I've had it happen within 6 as well.
The color change doesn't affect the taste of the pasta, but gives it a brownish color which you may not want.
If you're only storing it for a couple hours, you may be able to get away with storing the whole dough in the fridge or at room temperature and not have any color change. If you really need to prepare and cut the pasta beforehand, then you can do so and best to put it on a drying rack for a few hours.
In general your best bet for storing egg dough (whether for short or long term) and avoiding color change is to freeze the dough.
To do so the pasta dough should be already rolled out and cut into shape. Then liberally flour the pasta freeze in one layer on a baking tray for a couple hours before moving it to a more compact freezer bag or the like.
If you really need to freeze the dough whole, cover in cling film and freeze. Keep in mind it will need to sit in the fridge or at room temp to defrost before rolling it out so it could turn brown anyway.
Storing eggless dough
Pasta dough made without eggs is easier to store for longer periods because it doesn't turn brown like egg dough.
For short-term storage the best method is to put the pasta out to dry, on a perforated tray or pasta drying rack.
For long-term storage the best method is to freeze the pasta following the same steps as listed above for freezing egg pasta dough.
Of course you can also dry egg-free pasta for long-term storage but drying it out sufficiently is not simple. The pasta has to be totally dried out or it can mold.
This usually takes more than just drying at room temperature. The following indications are given by Harold McGee in On Food and Cooking:
- Dry pasta at 40-60 C / 100-140 F for a day, or;
- Dry pasta at 84 C / 185F for 2-5 hours and then a more extended drying phase (in a dehydrator for example).
As you can see, it isn't as simple as putting it out on a drying rack which is why freezing seems like the better option.
That being said, you can certainly dry the pasta out sufficiently if you feel comfortable doing so. There are a lot of nice things you can do with dry homemade pasta besides eating it.
For example you can gift it to someone for a special occasion - just make sure it's totally dried out so it doesn't mold and let them know they should eat it within a few weeks.
Special equipment for drying pasta
- Pasta drying stand: A pasta drying stand or pasta drying rack makes it easier to dry pasta because it increases the surface area exposed to air and also prevents the pasta from sticking to itself.
- Wire rack for drying: A wire cooking rack or even a perforated crisping tray is good for and-shaped pasta like orechiette or cavatelli.
Step 5: How to cook fresh pasta dough
Fresh pasta only needs about 2-3 minutes to cook in boiling salted water.
If you're cooking the dough from frozen or from dry, you may need to add a minute or two.
The best way to determine if the pasta is done is to just do a bite test on piece.
Some fresh pasta cooking tips:
- Use a big pot so you don't crowd the pasta.
- Marcella Hazan recommends boiling pasta in 4 liters / 1 gallon water for every 450 grams / 1 pound of pasta, add another liter / 0.25 gallon for every 225 grams / half pound of pasta. Don't cook more than 1kg at a time.
- It's a common myth that the pasta water needs to be 'salty like the sea'. This isn't true. The pasta dough already contains salt to help with the elasticity of the gluten. Plus, the pasta water itself is used for a lot of nice sauces - which adds even more salt. If you add a ton of salt to the water, you'll end up with way too salty pasta. I recommend about 2 teaspoons of salt for 4 liters / 1 gallon water. You can always add more salt if needed but you can't take it away if it's too much. Plus, salt in the pasta water doesn't aid cooking like salt in the dough aids gluten formation.
Equipment for cooking pasta
- Large slotted spoon: A large hand-held strainer, slotted spoon or ladle is better than a colander. When you use a colander you have to dump everything into it and lose all the pasta water. By using a slotted spoon you can just take the pasta out and put it directly into the sauce pan, and then use the pasta water to continue cooking it until finished.
- Colatutto (large tapered slotted spoon): In Italian kitchens you will often see a slightly different shaped slotted spoon with a basket that narrows towards the handle in sort of a diamond or oval shape. This is called a colatutto or scolatutto in Italian and makes it easier to scoop right along the edge of the pot so you can more easily take the pasta out. Maybe you've experienced fishing around the pot for those last bits of spaghetti that keep slipping past the sides of your strainer? This spoon prevents that. Not strictly necessary but nice to have.
Recipe
Classic Egg Pasta
Ingredients
- 400 grams flour tipo 00 pasta flour, approx. 2.5 cups
- 200 grams whole egg approx. 4 whole eggs
- 2 tablespoons water optional
- 5 grams salt approx. 1 teaspoon
Instructions
- Use a kitchen scale to weigh out the flour and eggs. If the 4 eggs do not come up to 200 grams, you can make up for the rest of the weight with water.
- Put the flour and salt in a large bowl. Mix them together and then crack in the eggs and any water being used.
- Use a fork to mix the ingredients until a shaggy dough forms.
- Use your hands to knead the dough for 5 - 8 minutes until it's smooth.
- Cover the dough with cling film and rest it for 30 minutes. After resting, it should be soft when pressed but should still slowly spring back up.
- Use a rolling pin or pasta machine to roll the dough out to a thickness of 3mm (0.10 inches). The pasta sheet should be at least 15 cm (6 inches) on the shortest end. See post instructions for tips on rolling out the dough.
- To make tagliatelle, liberally flour the sheet of dough on both sides. Cut it to 3.5mm width (0.15 inches). If using a pasta machine, use the most appropriate cutting attachment, If cutting by hand, roll the long ends of the sheet of dough in towards the center like a carpet, and then use a knife to cut into ribbons. See the post for details and photos on how this is done.
- Bring 4 liters / 1 gallon of water and 2 teaspoons of salt to boil. Add the pasta and cook for 3 minutes. It should float on the top when ready.
- Remove pasta from water (reserving pasta water if needed for sauce) and if not adding it to sauce right away then drizzle it with olive oil or butter so it doesn't stick.


Comments
No Comments