
These Romanian-style pickled green tomatoes and cauliflower are made by natural lacto-fermentation using a simple salt brine.
My native Romania has a very strong fermentation tradition. Home vegetable and fruit fermentation is widespread from the cellars of rural homesteads to the balconies of Communist bloc apartments in big cities. Nearly everyone home ferments.
In the Romanian fermentation tradition, fermented vegetables generally fall into three broad categories: mixed pickled vegetables (murături meaning 'pickles' broadly), sauerkraut (varză murată meaning pickled cabbage), and cucumbers (castraveți murați meaning pickled cucumbers). There are also outliers like fermented soup starter (zarzavat) but that's another story.
Mixed vegetable pickles, like these green tomatoes and cauliflower, are the most flexible and forgiving type of vegetable ferment. So this is likely to be a straightforward ferment even if it's your first time.
Ingredients
This post is focused on fermenting green tomatoes and cauliflower. There are some other minor additions that are 'supporting actors' in the mix.
They are not absolutely required to make the ferment work so feel free to just stick to green tomatoes and cauliflower (together or even separate) if that's your preference.

Green tomatoes: Not to be confused with tomatillos. These are tomatoes that have not had a chance to ripen. You can usually find them in the fall when many tomatoes remain unripe at the end of the growing season. They are firm and naturally acidic, which makes them easy to ferment and helps them keep their shape.
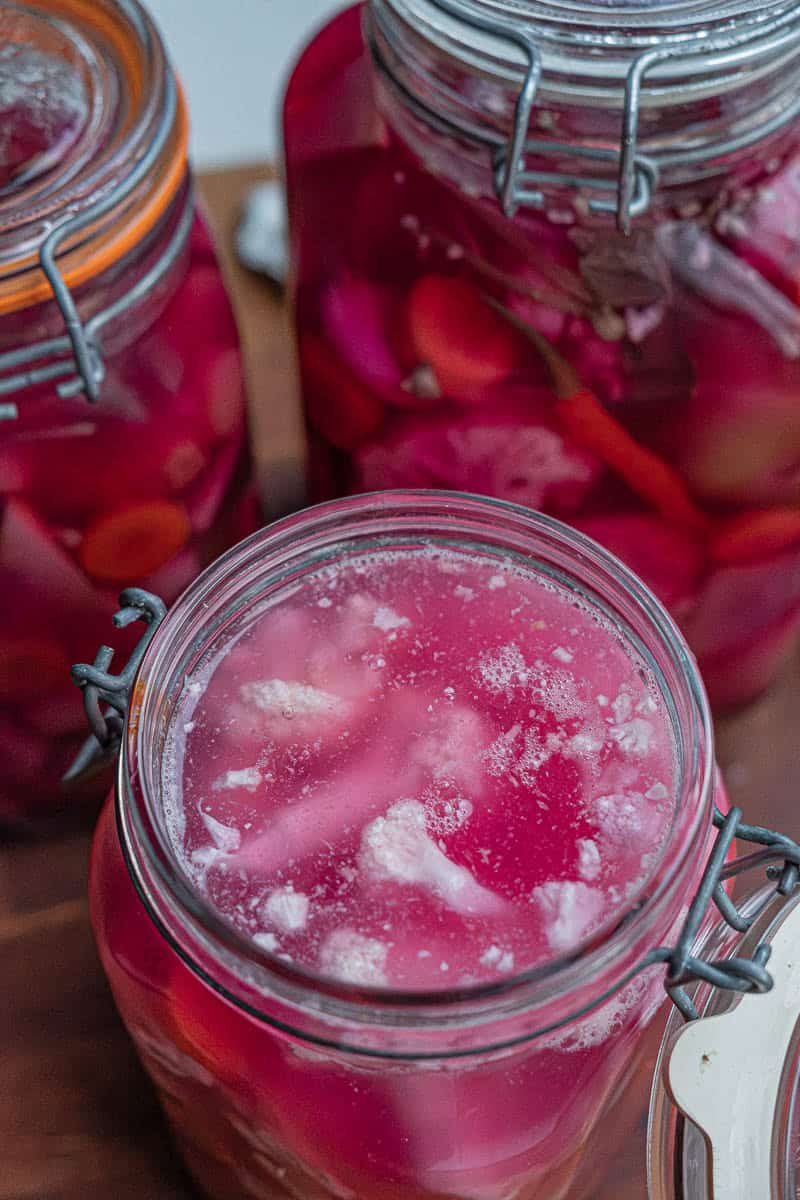
Cauliflower: Is dense and hard, so it stays crisp in a salt brine ferment and absorbs flavor well. It also turns pink from the beet.
Celery root (celeriac): Traditionally used for its sweet earthy aroma but also provides sugar to fuel fermentation and has mild antimicrobial activity due to phthalides.
Carrot: Provides sugar to fuel fermentation plus mild antimicrobial activity from phenolics.
Beet: Just a few segments of beet are added to turn the cauliflower a vibrant pink.
Garlic: Adds depth and flavor but also has antimicrobial properties to inhibit spoilage bacteria and yeasts.
Chili: Adds a bit of heat (or a lot if you like).
Celery leaves: Celery leaves give an earthy and savory aroma.
Dill: Dill adds an herbal sweetness.
Salt: Use non-iodized salt such as pickling salt or pure sea salt, as iodine and anti-caking agents can interfere with fermentation.
Equipment
- Wide mouth fermentation jars totaling about 5 liters / 5.3 quarts, for example:
- One 5-liter jar (about 5.3 quarts)
- One 3-liter jar (about 3.2 quarts) + one 2-liter jar (about 2.1 quarts)
- Two 2-liter jars (about 2.1 quarts each) + one 1-liter jar (about 1.1 quarts) - this is what's shown in the photos.
- Five 1-liter jars (about 1.1 quarts each)
- Kitchen scale (recommended for accurate salt measurement)
- Large (1 liter / 1 quart +/-) measuring cup for mixing the brine
- Sharp knife and cutting board
- Fermentation weights or small clean saucers, bowls etc. to keep vegetables submerged (you can improvise)
- Lids For cold-ferments, snap lids with rubber seals are good. For warm-ferments, opt for loose-fitting lids or fermentation airlocks (standard lids, lightly closed, also work)
- Cloth or tray to place under the jars in case of overflow during active fermentation
Instructions
1. Prep the Vegetables
First wash everything thoroughly, some vegetables like the celery root and beet may need a good scrub too.
Some of the vegetables can be cut to fit easier into the jars:
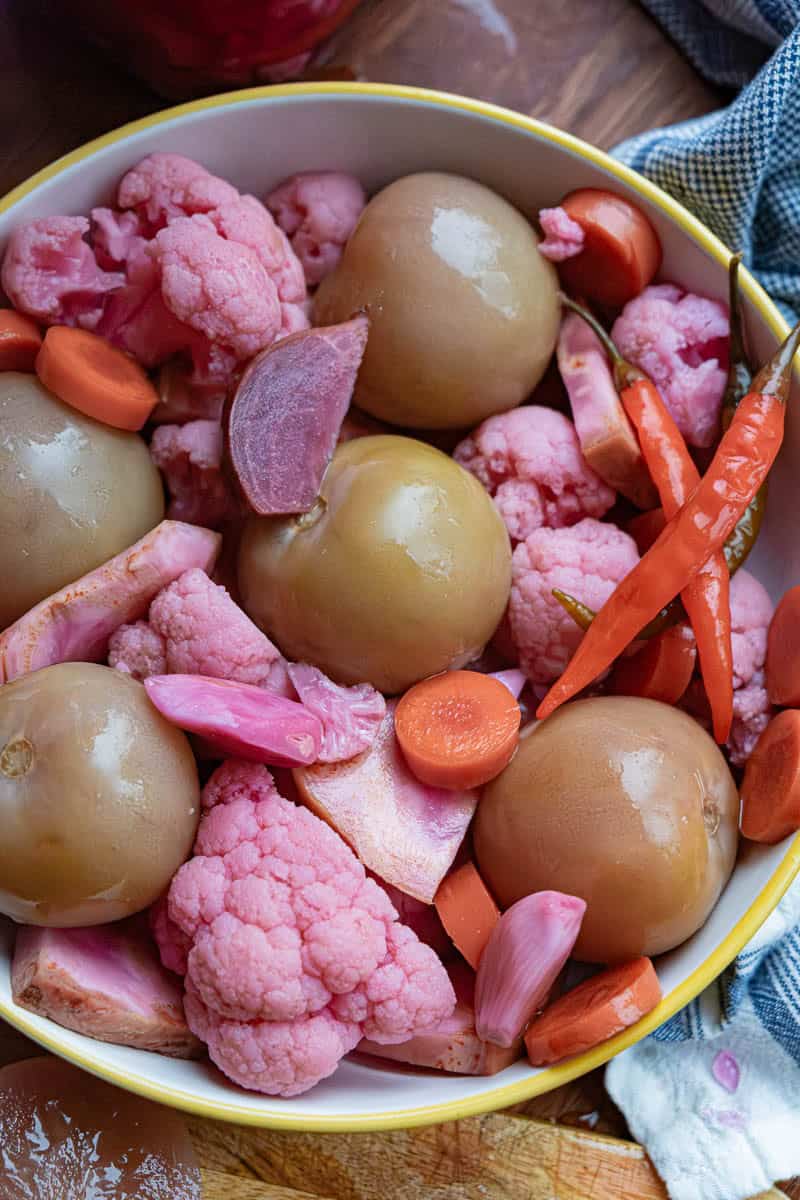
- Green tomatoes: Remove stems. Leave whole if small or cut in half if larger ones.
- Cauliflower: Remove outer leaves, cut into small, medium and large florets (about olive size, cherry tomato size and golf-ball size).
- Celery root: Cut the celery head into two halves, and then cut one of those halves into a quarter. This recipe only uses a quarter of a head of celery but you can either pickle more of the celery root or use it for something else like roasting or pureeing. Cut the remaining quarter into wedges or batons.
- Carrots: Cut into thick sticks or large coins.
- Beets: Peel and cut into about 8 wedges.
- Garlic: Peel cloves and leave whole.
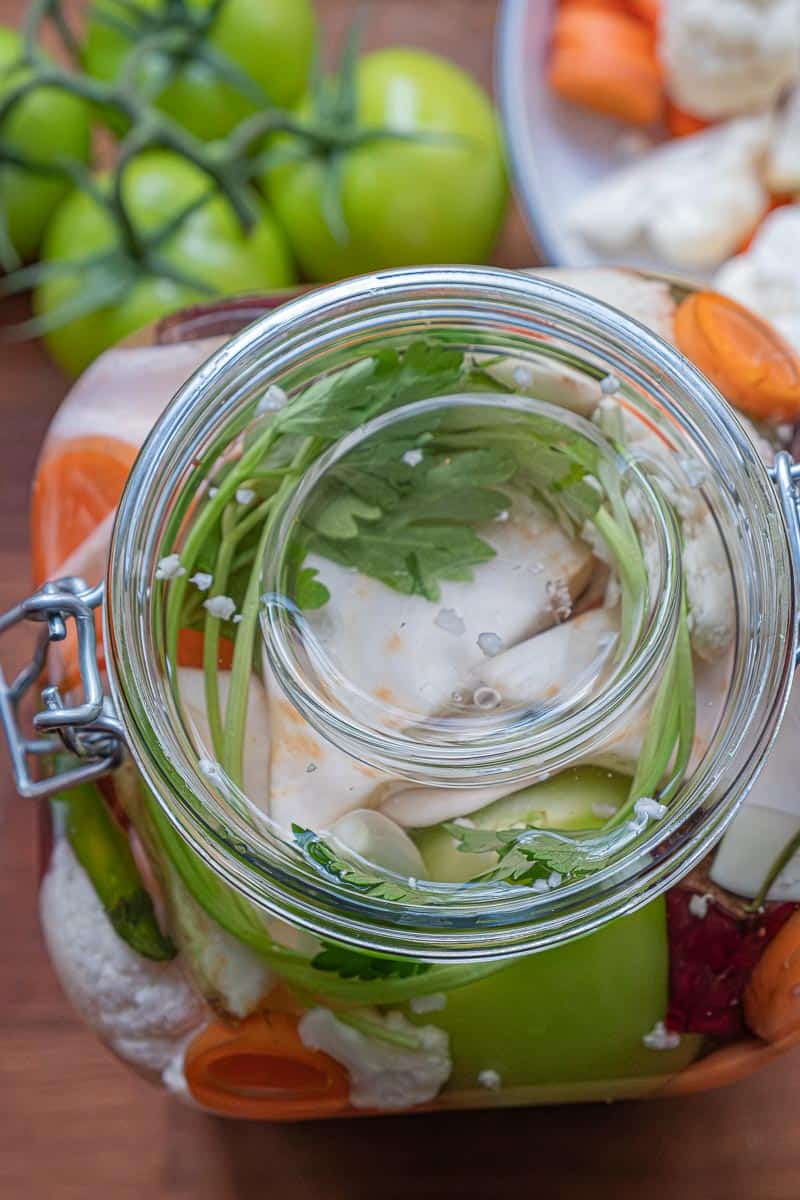
- Dill & celery leaves: Rinse well and leave whole.
- Chilis: Leave whole - remove stems if you like.

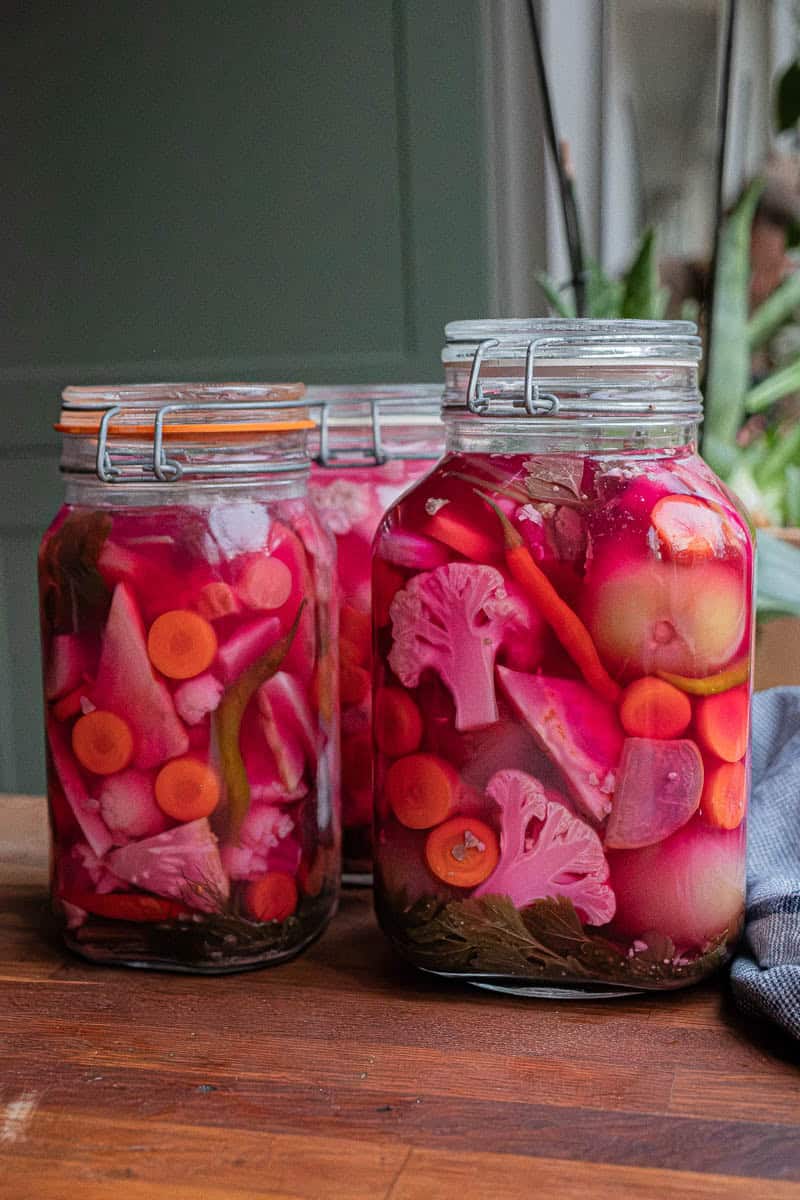
2. Pack your jars
Add a layer of celery and dill leaves to the bottom of each jar. It helps to make little bunches, and the offset each stem by a bit so you have a full circle of leaves like a wreath. Throw in some garlic cloves and chilies as well.
Then you start layering in the tomatoes and cauliflower, with carrots and celery root to fill in the smaller spaces and a little sliver of beet here and there for color.


You want a quite snug fit. Don't press so hard as to break the vegetables, but press firmly and evenly.
You can also take bits out and readjust as you go if you feel you can get a more efficient fit.
The goal is to fit as much of the jar with vegetables as possible.
3. Make the brine
Once your jar(s) are full, you fill up the remaining space with brine.
Use non-iodized salt such as pickling salt or pure sea salt, as iodine and anti-caking agents can interfere with fermentation.
Usually a good concentration for green tomatoes and cauliflower (or generally for mixed pickled vegetables) is 2% - 2.5%.
A 2% salt brine is made by dissolving 20 grams of salt in 1 liter of water (approximately 0.7 ounces of salt per 4¼ cups of water).
A 2.5% salt brine is made by dissolving 25 grams of salt in 1 liter of water (approximately 0.9 ounces of salt per 4¼ cups of water).
Salt Concentration & Temperature
The precise concentration of salt depends on if you plan to ferment inside (countertop) or outside in cool or cold temperatures.
- If you're fermenting inside where it's warm, use a bit more salt - a 2.5% concentration is sufficient.
- If you're fermenting outside or in a cellar etc., use less salt - 2% is good.
It's a good idea to mix up 1 liter of brine at a time until your vessel is full (unless you're using a full on barrel in which case you should mix up as much as your mixing vessels allow).
Leave about 2-3 cm / 1 inch of space at the top of each jar to allow for bubbling and expansion during active fermentation.


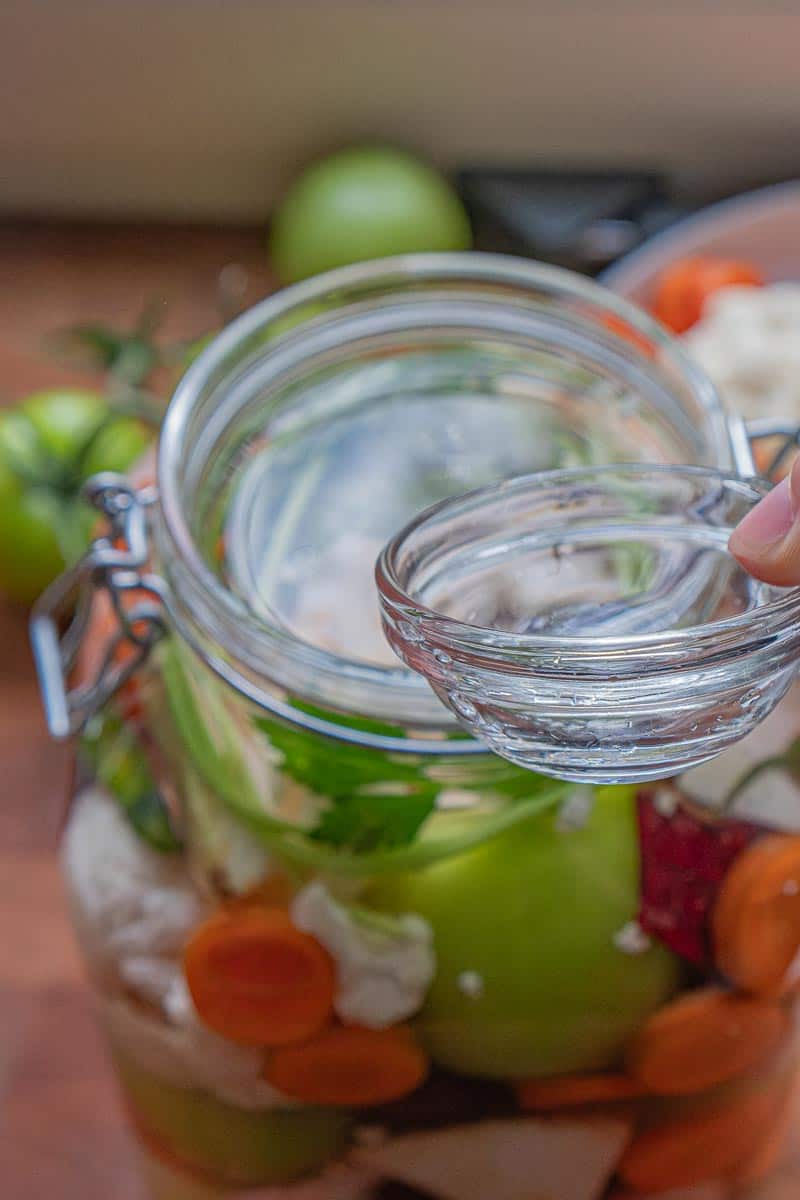
Once you've poured the brine into the jars, then (if you have them) put fermentation weights in the jars to weigh down the vegetables and keep them submerged.
You can also DIY this like I did by using a bowl or something similar. Just make sure the bowl is right-side up and also fully submerged - you don't want it to trap air and expose the vegetables to air as this can cause spoilage.
In the first few days, the vegetables may shift or release more liquid. If any pieces rise above the brine, top up with freshly mixed brine of the same salt concentration to keep everything fully submerged.
How long does it take to lacto-ferment mixed vegetables?
For a countertop ferment at about 18-21°C (64-70°F), you can expect the pickles to be ready in 7-10 days.
For a cold-environment ferment, roughly 0-7°C (32-45°F), it can take 4-6 weeks, depending on temperature fluctuations.
And for all temperatures in between, your timelines may vary but you can get an idea from these outer limits.
In general, cold ferment increases the window during which specific flavor producing organisms are active before strong acid producers dominate.
A cold ferment produces more complex flavor. But it also takes longer so...it's a give and take.
For an indoor ferment you can set up a little countertop 'fermentation station' like I've done below for sauerkraut and pickled cauliflower and carrots.

If you are fermenting at room temperature, then make sure you are not using really tightly fitting lids because the gasses can build up very rapidly and create a lot of pressure.
You can also speed up a cold-ferment by starting the pickles inside for 24-48 hours then moving them outside.


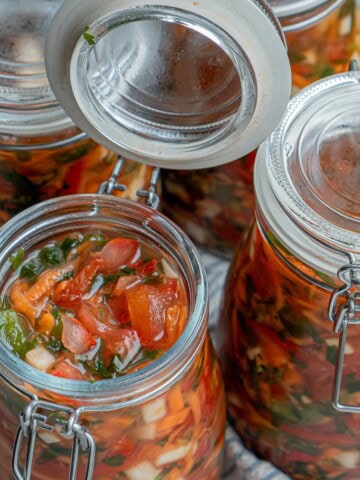
The pickled green tomatoes and cauliflower are ready when the brine has a distinctly sour taste (rather than just salty) and the vegetables lose their raw bite, but are still crisp.
The brine can also have some fizziness when first opened after being sealed, as shown in this photo:
Signs of Spoilage in Lacto-Fermented Pickles
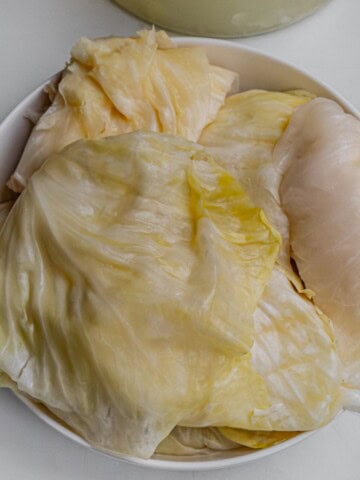
Discoloration from air exposure: Vegetables exposed to air can become discolored (see example of discoloration on cauliflower below). This isn't necessarily a problem as long as there are no other signs of mold and the ferment smells clean and pleasantly sour (not foul). Discolored pieces can be trimmed off; then make sure all vegetables are fully submerged.
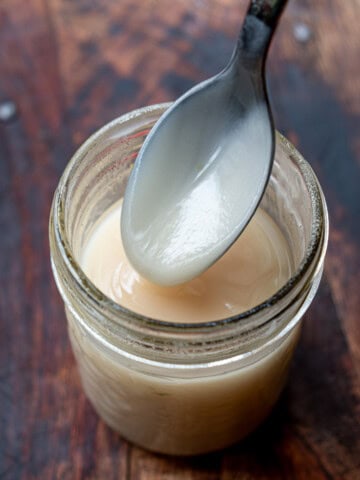
White surface film (kahm yeast): A thin white film on the surface is harmless and can be skimmed off. It may slightly affect flavor but does not make the pickles unsafe.
Fuzzy or colored mold: Fuzzy growth or mold that is green, blue, black, or pink is a sign to discard the entire batch.
Off or rotten smell: A strong unpleasant odor (rotten, putrid, or sulfurous) rather than a clean, tangy sour smell indicates spoilage.
Soft or slimy texture: Vegetables that become very soft, mushy, or slimy instead of crisp indicate the ferment has gone bad.
Lack of acidity: If the brine never develops a sour flavor and just tastes flat or salty (even after sufficient fermentation time), the ferment has likely failed.

Serving Suggestion
In Romania we eat homemade lacto-fermented pickles as a side dish with a lot of different foods, most commonly homemade Romanian sausages, roast meat, roast chicken and chicken schnitzel but also dishes like rice pilaf and chicken livers with mămăligă.
You can also drink the fermentation liquid. In Romania this is the classic go-to handover remedy.

Recipe

Romanian-Style Pickled Green Tomatoes and Cauliflower
Ingredients
- 15 green tomatoes medium-sized
- 1 head cauliflower
- 0.25 head celery root
- 3 carrots
- 2 beets small
- 6 cloves garlic
- 1 bunch fresh dill
- 1 bunch celery leaves
- 20 grams salt per liter water
- 1 liter water
Equipment
- 5 1 liter (1 quart) jars with lids or 5 liters (5.3 quarts) equivalent in other size jars
- kitchen scale for calculating salt
- Large (1 liter / 1 quart +/-) measuring cup for mixing the brine
- fermentation weights or DIY weight
- cutting board and sharp knife
- kitchen towels for fermentation station
Instructions
- Prep the vegetables: Wash all vegetables well. Remove tomato stems (halve large tomatoes). Cut cauliflower into mixed-size florets. Cut celery root into wedges or batons, carrots into thick sticks or coins, and beet into a few wedges. Peel garlic; leave chilies whole. Rinse dill and celery leaves.
- Pack the jars: Line the bottom of each jar with dill and celery leaves. Add garlic and chilies, then tightly pack the green tomatoes and cauliflower, using carrots and celery root to fill gaps and a few beet pieces for color. Pack firmly but without crushing.
- Make the brine: Prepare a salt brine depending on fermentation temperature:- Warm ferment (indoor): 2.5% brine (25 g salt per 1 liter / ~4¼ cups water)- Cold ferment (outdoor, cellar): 2% brine (20 g salt per 1 liter / ~4¼ cups water)Mix brine as needed and pour over vegetables until fully submerged.
- Weight and sea: lAdd fermentation weights (or a clean improvised weight) to keep vegetables submerged. Seal jars appropriately: loose lids or airlocks for warm ferments; regular lids for cold ferments. Place jars on a tray to catch overflow.
- Ferment:- Warm ferment at about 18-21°C (64-70°F) for 7-10 days.- Cold ferment at about 0-7°C (32-45°F) for 4-6 weeks. You can also start the ferment indoors for 24-48 hours, then move to a colder location.
- Check for doneness: The pickles are ready when the brine tastes pleasantly sour rather than just salty, and the vegetables have lost their raw bite but remain crisp.
- Store: Once fermented to your liking, move jars to cold storage to slow fermentation.
Nutrition
Related Recipes
Maybe you'll also like:

Comments
No Comments